
작업 내용
댓글을 구현하기 위한 CRUD 중 C와 R을 구현해 보자!
다음은 구현해야 할 내용이다.
댓글 입력 (Create)
- 댓글 입력 폼에 내용을 입력한 뒤 submit을 누르면 리스트에 추가된다.
- 입력 폼이 비어있는 상태에서 submit을 누르면 경고 팝업을 띄운다.
- 댓글을 성공적으로 처리하면 입력 폼을 reset 한다.
- 입력한 값을 아이디, 댓글 내용, 날짜 형태로 된 객체로 만들어 리스트에 넣는다.
댓글 출력 (Read)
- 댓글 내용은 아이디, 댓글 내용, 날짜로 표현한다.
- 댓글 리스트는 최신순으로 나타낸다.
- 댓글 총 개수를 표시한다.
구현
HTML / CSS
일단 HTML과 CSS는 미리 구현되어 있는 걸 사용한다. Javascript로 Create와 Read를 구현하는데 집중하자!
# practice.html
<!DOCTYPE html>
<html lang="en">
  <head>
    <meta charset="UTF-8" />
    <meta http-equiv="X-UA-Compatible" content="IE=edge" />
    <meta name="viewport" content="width=device-width, initial-scale=1.0" />
    <title>Document</title>
    <link rel="stylesheet" href="public/css/practice.css" />
  </head>
  <body>
    <div>
      <ul class="comment">
        <li class="comment-form">
          <form id="commentFrm">
            <h4>댓글쓰기 <span></span></h4>
            <span class="ps_box">
              <input type="text" placeholder="댓글 내용을 입력해주세요." class="int" name="content" />
            </span>
            <input type="submit" class="btn" value="등록" />
          </form>
        </li>
        <li id="comment-list"></li>
      </ul>
    </div>
    <script src="public/js/practice.js"></script>
  </body>
</html>
# practice.css
* {
  margin: 0;
  padding: 0;
}
ul,
li {
  list-style: none;
}

.comment {
  display: flex;
  flex-direction: column;
  flex-wrap: nowrap;
  padding: 30px;
  width: 600px;
  margin: 0 auto;
}

.comment > li {
  margin-top: 20px;
}
.comment > li:nth-child(1) {
  margin: 0px;
}

.comment-row {
  display: flex;
  justify-content: space-between;
  flex-direction: row;
}

.comment-row {
  margin-top: 20px;
  width: 100%;
}

.comment-row > li:nth-child(2) {
  flex-shrink: 0;
  flex-grow: 1;
  padding-left: 25px;
  z-index: 1;
  width: 100%;
}

.comment-row > li:nth-child(2) {
  width: 85px;
}

.comment-form > form {
  display: flex;
  flex-direction: row;
  flex-wrap: wrap;
  justify-content: space-between;
}

.comment-form > form > h4 {
  width: 100%;
  margin: 14px 0 14px 0;
}

.comment-content {
  cursor: pointer;
  word-break: break-all;
  padding-right: 25px;
}

.ps_box {
  display: block;
  position: relative;
  width: 80%;
  height: 51px;
  border: solid 1px #dadada;
  padding: 10px 14px 10px 14px;
  background: #fff;
  box-sizing: border-box;
}

.ps_box > input {
  outline: none;
}

.int {
  display: block;
  position: relative;
  width: 100%;
  height: 29px;
  padding-right: 25px;
  line-height: 29px;
  border: none;
  background: #fff;
  font-size: 15px;
  box-sizing: border-box;
  z-index: 10;
}

.btn {
  width: 18%;
  padding: 18px 0 16px;
  text-align: center;
  box-sizing: border-box;
  text-decoration: none;
  border: none;
  background: #333;
  color: #fff;
  font-size: 14px;
}

.comment-delete-btn {
  display: inline-block;
  margin-left: 7px;
  cursor: pointer;
}

.comment-update-input {
  border: none;
  border-bottom: 1px solid #333;
  font-size: 16px;
  color: #666;
  outline: none;
}
Javascript
1. 댓글 입력폼에 내용을 입력한 뒤 submit을 누르면 리스트에 추가 (Create)
댓글 입력폼에 내용을 입력한 뒤 submit을 누르면 리스트에 추가가 되도록 해보자!
먼저 사용할 요소를 선택해 준다. submit 이벤트는 form 요소에서만 사용이 가능하기 때문에 submit 이벤트 사용을 위해 form 요소를 선택해주자!
const commentBtn = document.querySelector("#commentFrm");
const list = [];

console.log(commentBtn);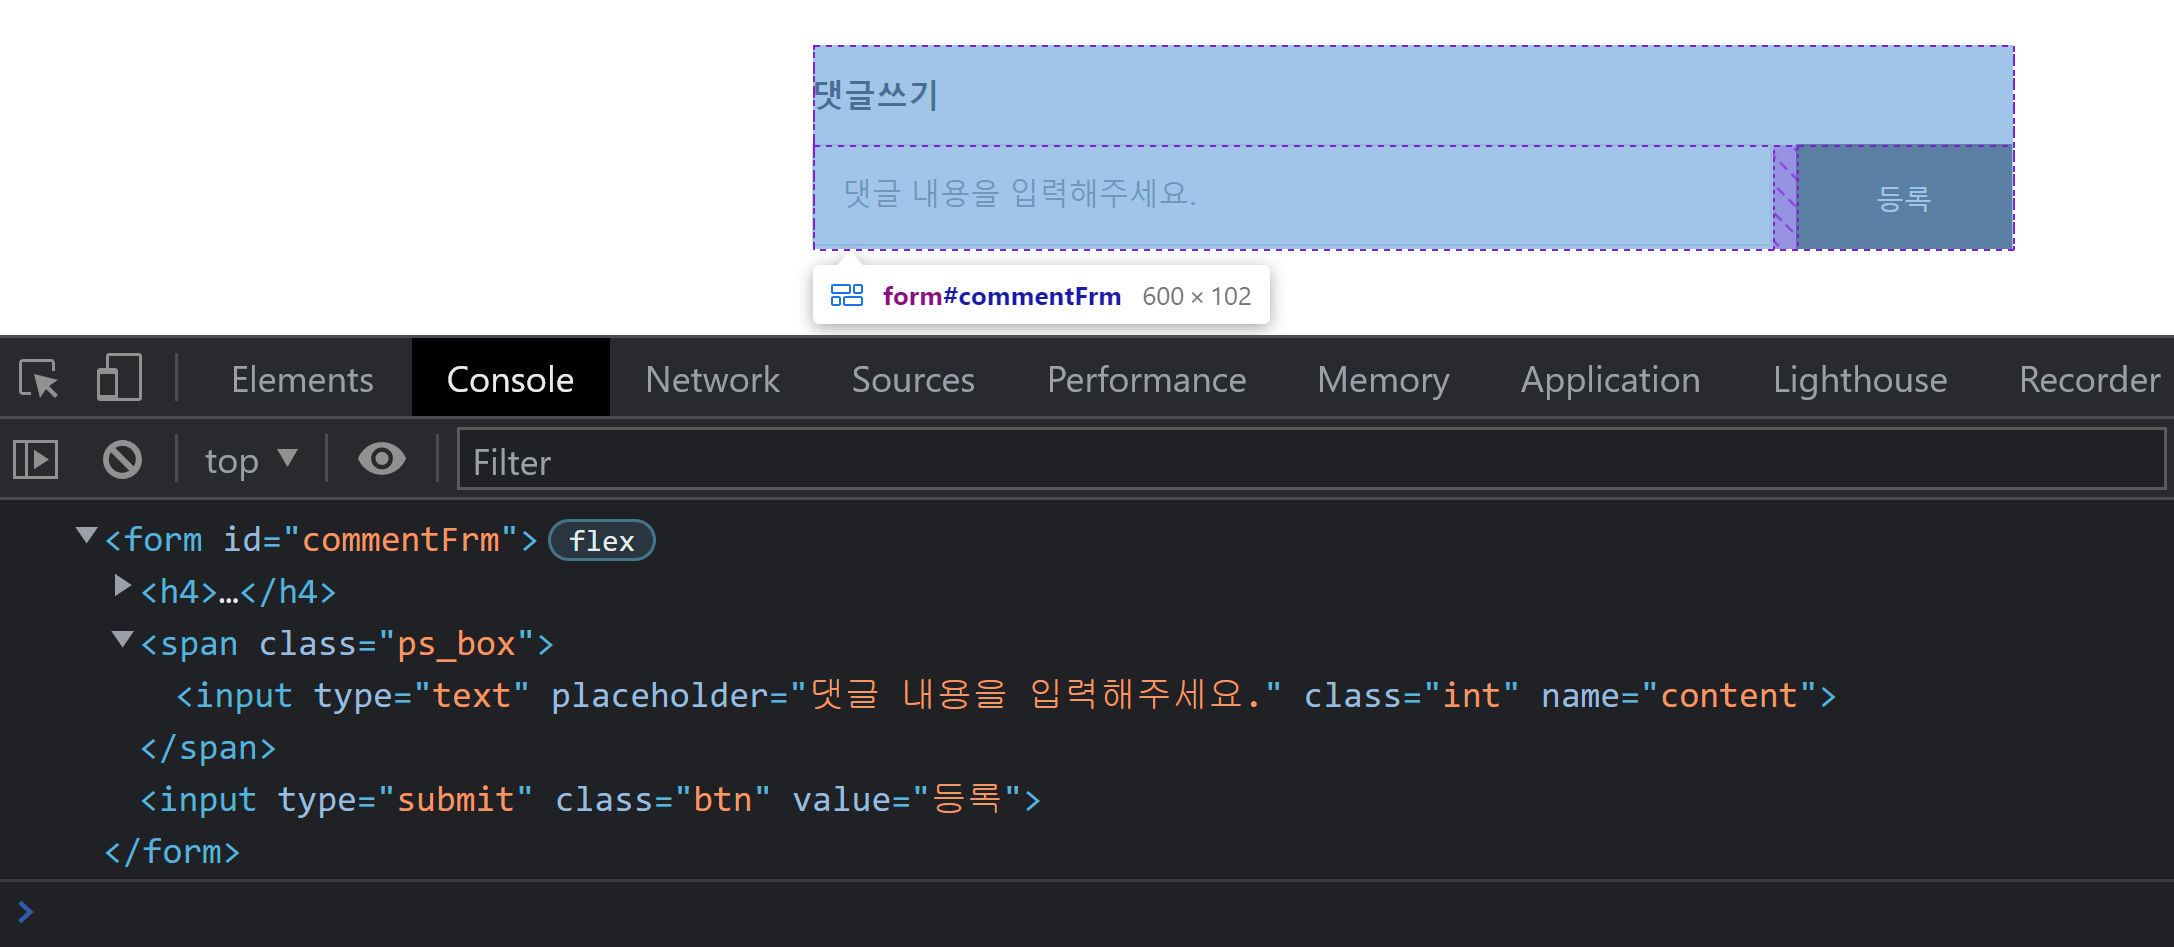
Event.preventDefault()
이벤트 흐름의 어떤 단계에서도 preventDefault()를 호출하면 기본 동작을 취소할 수 있다.
예를 들면 a 태그나 submit 태그는 누르면 href를 통해 이동하거나 창이 새로고침 되어 실행이 된다.
preventDefault()를 이용해 이 동작을 막아줄 수 있다.
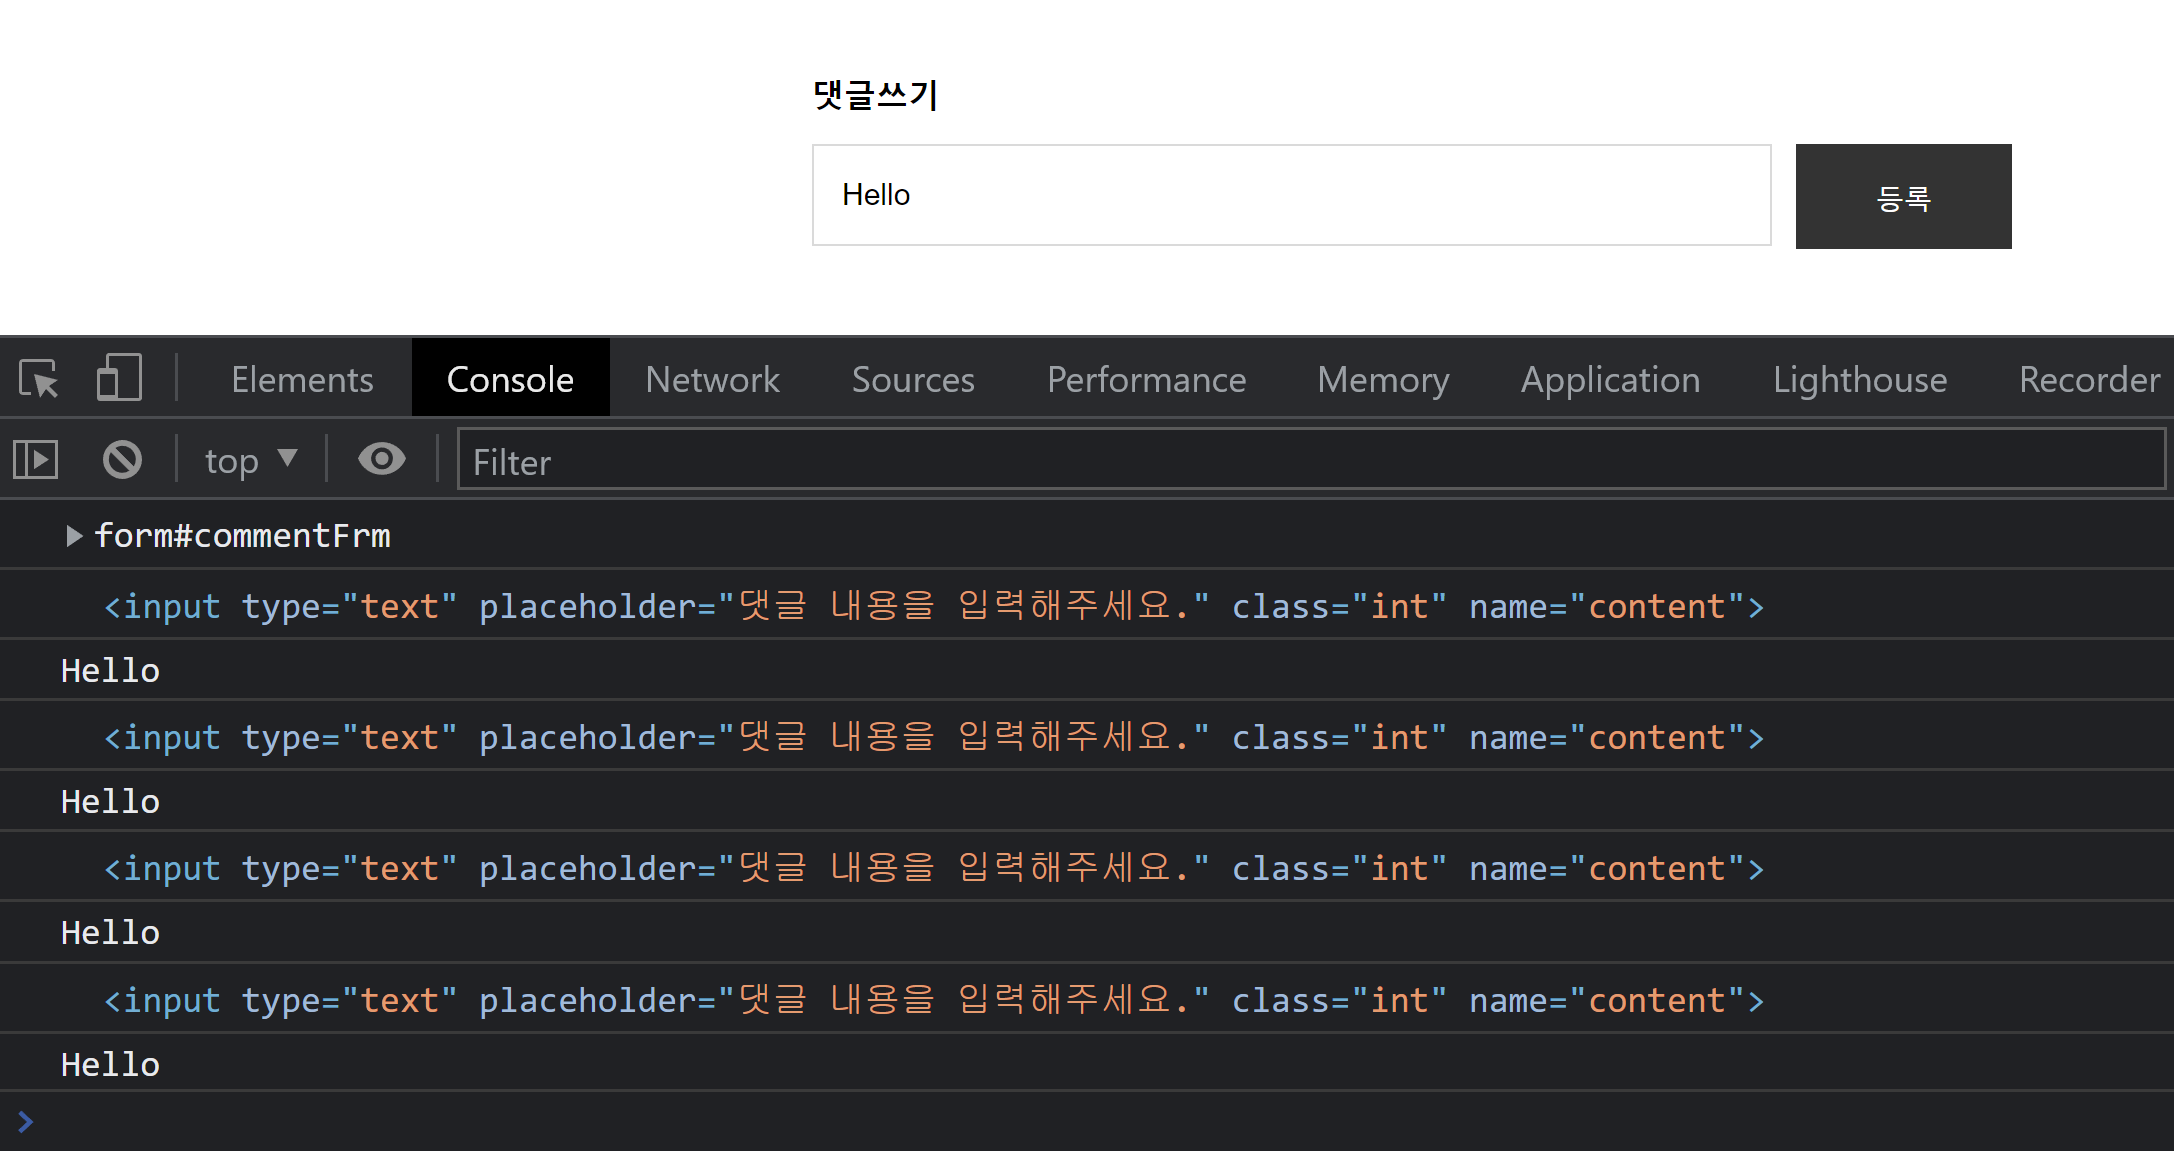
submit 버튼을 누르면 input을 통해 입력받은 값들을 key=value 형태로 서버에 전송해 준다고 한다. 전송되고 나면 창이 새로고침 되는데 이렇게 되면 input에 입력한 값을 javascript에서 사용하기 어렵다. preventDefault()를 이용해서 submit 버튼의 기본 동작을 막아주자! 그리고 이벤트도 등록해 주자!
추가로 버튼을 클릭해 input에 값을 입력하면 어디에 값이 들어가는지도 찾아보자!
const commentBtn = document.querySelector("#commentFrm");
const list = [];

function commentBtnHandler(e) {
  e.preventDefault();
  console.dir(e.target);
  console.log(e.target[0]);
  console.log(e.target[0].value);
  console.log(e.target.elements[0]);
  console.log(e.target.elements[0].value);
  console.log(e.target.elements.content);
  console.log(e.target.elements.content.value);
  console.log(e.target.content);
  console.log(e.target.content.value);
}

commentBtn.addEventListener("submit", commentBtnHandler);
input에 값을 넣고 submit을 누르면 이벤트 객체가 생성되는데 이 객체안에객체 안에 무수한 객체들이 존재한다. 내가 원하는 input에 입력한 값을 찾아보았는데 위와 같은 객체 안에 value값으로 값이 존재하고 있었다. 이 부분은 조금 더 공부를 해봐야 알 것 같다. 나는 일단 마지막에 적은 e.target.content의 value를 사용할 예정이다.
input에 입력한 값을 찾았으니 이걸 list에 push를 사용해 담아주기만 하면 이 작업은 끝난다.
const commentBtn = document.querySelector("#commentFrm");
const list = [];

function commentBtnHandler(e) {
  e.preventDefault();
  list.push(e.target.content.value);
  return console.log(list);
}

commentBtn.addEventListener("submit", commentBtnHandler);
2. 입력폼이 비어있는 상태에서 submit을 누르면 경고 팝업 띄우기 (Create)
이건 간단하다 조건문을 사용해 빈 문자열이면 alert를 이용해 경고창을 띄우면 된다.
const commentBtn = document.querySelector("#commentFrm");
const list = [];

function commentBtnHandler(e) {
  e.preventDefault();
  const input = e.target.content;
  if (input.value === "") {
    alert("내용을 넣고 등록 버튼을 눌러주세요.");
    return;
  }
  list.push(input.value);
}

commentBtn.addEventListener("submit", commentBtnHandler);
3. 댓글을 성공적으로 처리하면 입력폼을 reset (Create)
이 작업은 form 요소의 reset 메서드를 사용한다.
HTMLFormElement.reset()
이 메서드는 요소의 값을 기본값으로 초기화하는 메서드이다.
const commentBtn = document.querySelector("#commentFrm");
const list = [];

function commentBtnHandler(e) {
  e.preventDefault();
  const input = e.target.content;
  if (input.value === "") {
    alert("내용을 넣고 등록 버튼을 눌러주세요.");
    return;
  }
  list.push(input.value);
  e.target.reset();
}

commentBtn.addEventListener("submit", commentBtnHandler);
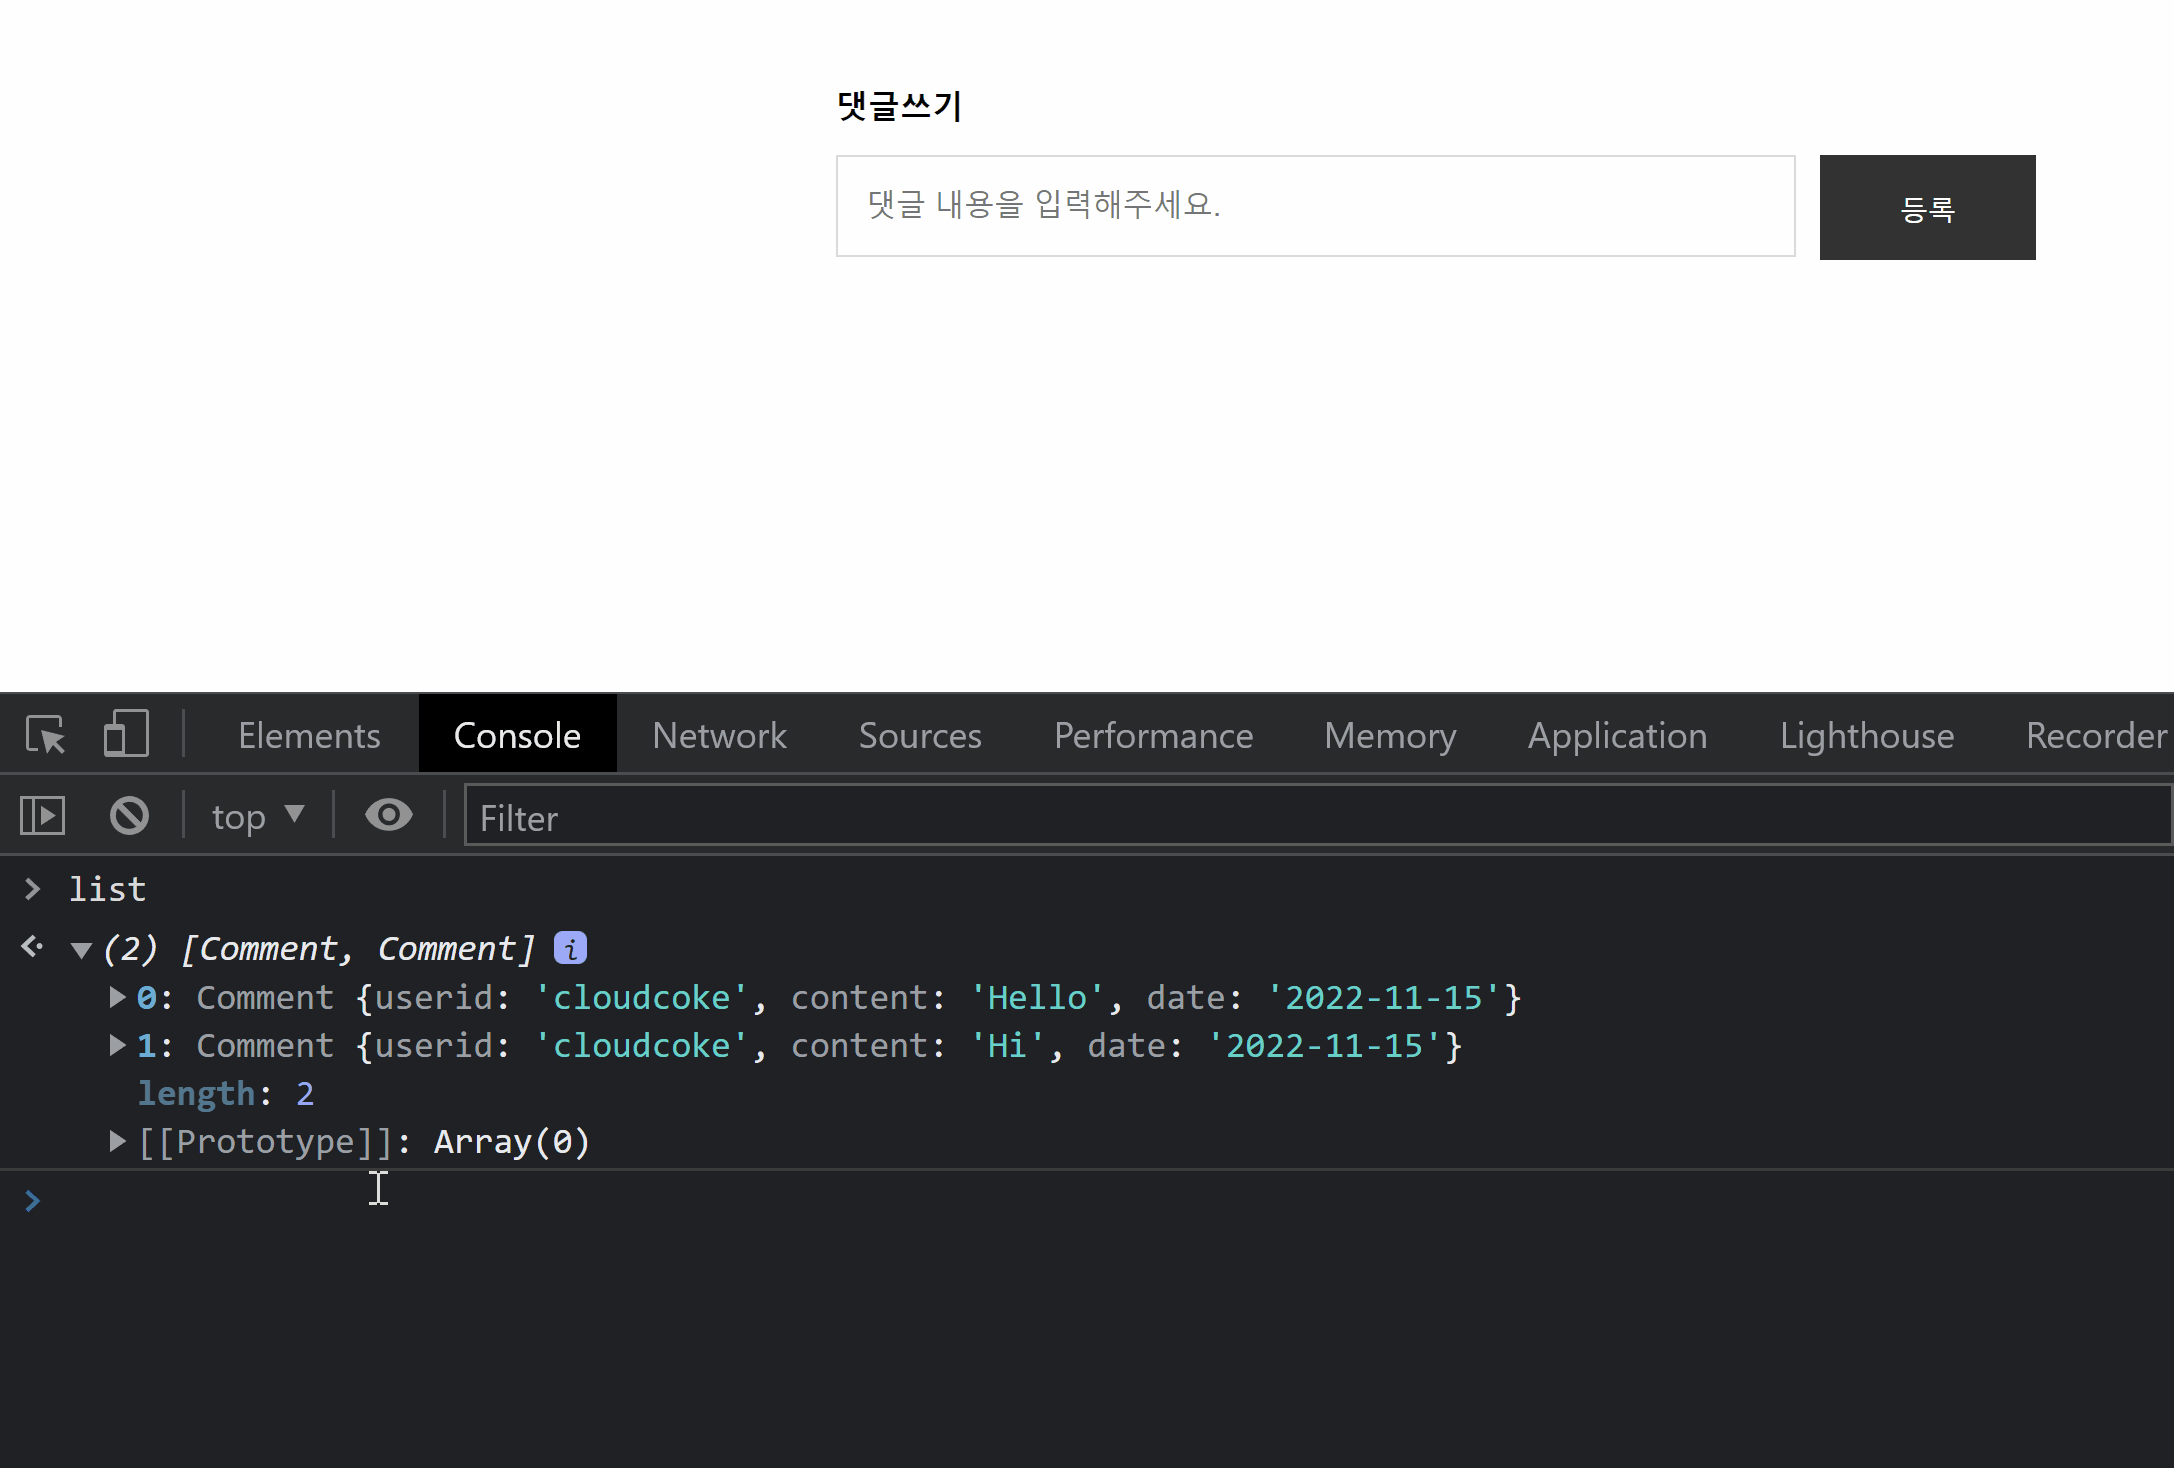
4. 입력한 값을 아이디, 댓글 내용, 날짜 형태로 된 객체로 만들어 리스트에 넣기 (Create)
사용자의 아이디, 댓글 내용, 날짜는 달라야 하지만 여기서는 댓글 내용 부분만 다르게 할 예정이다.
먼저 아이디, 댓글 내용, 날짜를 담는 객체를 찍어낼 생성자 함수를 선언하자!
function Comment(content) {
  this.userid = "cloudcoke";
  this.content = content;
  this.date = "2022-11-15";
}
submit을 누르면 작성한 댓글이 들어간 객체를 생성해 리스트에 넣는 작업을 해보자!
const commentBtn = document.querySelector("#commentFrm");
const list = [];

function Comment(content) {
  this.userid = "cloudcoke";
  this.content = content;
  this.date = "2022-11-15";
}

function commentBtnHandler(e) {
  e.preventDefault();
  const input = e.target.content;
  if (input.value === "") {
    alert("내용을 넣고 등록 버튼을 눌러주세요.");
    return;
  }
  const commentObj = new Comment(input.value);
  list.push(commentObj);
  e.target.reset();
}

commentBtn.addEventListener("submit", commentBtnHandler);
Create은 끝났다. 이제 Read 부분을 작업해 보자!
1. 댓글 내용은 아이디, 댓글 내용, 날짜로 표현 (Read)
댓글을 쓰게되면 입력란 아래에 쓴 댓글이 보이도록 해야 한다. 출력돼야 하는 부분은 아이디, 댓글 내용, 날짜이다.
먼저 요소를 추가할 부분인 comment-list를 선택한다.
const commentList = document.querySelector("#comment-list");

console.log(commentList);
이제 요소를 생성해야 한다.
요소 생성은 createElement 메서드를 이용해 요소를 생성할 수 있다.
요소를 생성할 때 다음과 같이 하지 않도록 주의해야 한다.
요소를 생성한 값은 리턴값이 참조 형태이기 때문에 하나를 수정해도 다른 것들에게 영향을 미치기 때문이다.
const li1 = document.createElement("li"); // 참조형태이기 때문에
const li2 = li1;
const li3 = li1;

// 위 코드는 다음과 같음
const obj1 = {};
const obj2 = obj1;
const obj3 = obj1;
요소를 다음과 같이 생성하자!
ul 태그 생성하고 li 태그를 3개를 생성해 주면 된다.
function createRow() {
  const ul = document.createElement("ul");
  const li1 = document.createElement("li");
  const li2 = document.createElement("li");
  const li3 = document.createElement("li");

  console.log(ul);
  console.log(li1);
  console.log(li2);
  console.log(li3);
}
요소를 생성하면 생성만 되고 아무 변화가 없다. 원하는 형태로 만들려면 ul안에 li를 넣어 줘야 한다.
function createRow() {
  const ul = document.createElement("ul");
  const li1 = document.createElement("li");
  const li2 = document.createElement("li");
  const li3 = document.createElement("li");

  ul.append(li1);
  ul.append(li2);
  ul.append(li3);

  return ul;
}
CSS를 적용하려면 생성한 요소에 class 속성을 부여해야 한다. setAttribute 메서드를 사용하면 원하는 속성을 부여할 수 있다.
function createRow() {
  const ul = document.createElement("ul");
  const li1 = document.createElement("li");
  const li2 = document.createElement("li");
  const li3 = document.createElement("li");

  ul.append(li1);
  ul.append(li2);
  ul.append(li3);

  ul.setAttribute("class", "comment-row");
  li1.setAttribute("class", "comment-id");
  li2.setAttribute("class", "comment-content");
  li3.setAttribute("class", "comment-date");

  return ul;
}
아이디, 댓글 내용, 날짜를 화면에 출력하려면 innerHTML을 이용해 요소에 내용을 추가해 주어야 한다.
매개변수 3개를 받아서 각각 li1과 li2와 li3에 내용을 추가해 주자!
function createRow(userid, content, date) {
  const ul = document.createElement("ul");
  const li1 = document.createElement("li");
  const li2 = document.createElement("li");
  const li3 = document.createElement("li");

  ul.append(li1);
  ul.append(li2);
  ul.append(li3);

  ul.setAttribute("class", "comment-row");
  li1.setAttribute("class", "comment-id");
  li2.setAttribute("class", "comment-content");
  li3.setAttribute("class", "comment-date");

  li1.innerHTML = userid;
  li2.innerHTML = content;
  li3.innerHTML = date;

  return ul;
}
이제 생성한 요소를 comment-list 부분에 추가하자!
function drawing() {
  for (let i = 0; i < list.length; i++) {
    const row = createRow(list[i].userid, list[i].content, list[i].date);
    commentList.append(row);
  }
}
ul을 만들기 위해 createRow 함수를 호출 했고 li 안에 콘텐츠를 채우기 위해 list에 있는 객체를 이용했다. 그다음 그 값을 commentList에 추가해 comment-list에 요소가 추가될 수 있도록 하였다.
여기서 문제가 발생한다. drawing 함수를 호출할 때마다 값이 누적되어서 출력이 된다.
drawing 함수를 호출할 때 commentList를 빈 값으로 만들어 주면 문제가 해결된다.
function drawing() {
  commentList.innerHTML = "";
  for (let i = 0; i < list.length; i++) {
    const row = createRow(list[i].userid, list[i].content, list[i].date);
    commentList.append(row);
  }
}
이 함수를 commentBtnHandler에 넣어주면 댓글을 쓸때마다 아래에 입력한 내용이 출력되게 된다.
function commentBtnHandler(e) {
  e.preventDefault();
  const input = e.target.content;
  if (input.value === "") {
    alert("내용을 넣고 등록 버튼을 눌러주세요.");
    return;
  }
  const commentObj = new Comment(input.value);
  list.push(commentObj);

  drawing();
  e.target.reset();
}
2. 댓글 리스트는 최신순으로 나타낸다. (Read)
댓글을 등록하면 마지막에 작성한 댓글이 맨 아래에 나오게 된다. 맨 마지막에 작성한 댓글이 맨 위로 올라오게 하려면 어떻게 해야 할까?
다음과 같이 drawing 함수를 수정해 주면 된다.
function drawing() {
  commentList.innerHTML = "";
  for (let i = list.length - 1; i >= 0; i--) {
    const row = createRow(list[i].userid, list[i].content, list[i].date);
    commentList.append(row);
  }
}
for문을 역순으로 돌리면 해결이 된다.
3. 댓글 총개수를 표현다. (Read)
댓글의 총 개수를 표현하는 방법은 쉽다. 다음과 같이 코드를 작성해 주면 된다.
const total = document.querySelector("h4 > span");

function totalRecord() {
  total.innerHTML = `(${list.length})`;
}
이 함수도 commentBtnHandler에 넣어주면 댓글을 작성할 때마다 갱신이 된다.
function totalRecord() {
  total.innerHTML = `(${list.length})`;
}

function commentBtnHandler(e) {
  e.preventDefault();
  const input = e.target.content;
  if (input.value === "") {
    alert("내용을 넣고 등록 버튼을 눌러주세요.");
    return;
  }
  const commentObj = new Comment(input.value);
  list.push(commentObj);
  totalRecord();

  drawing();
  e.target.reset();
}
그리고 처음부터 댓글 개수를 보고 싶다면 전역에 호출을 해주면 된다.
아래는 최종 완성 코드이다.
const commentBtn = document.querySelector("#commentFrm");
const commentList = document.querySelector("#comment-list");
const total = document.querySelector("h4 > span");
const list = [];

function Comment(content) {
  this.userid = "cloudcoke";
  this.content = content;
  this.date = "2022-11-15";
}

function createRow(userid, content, date) {
  const ul = document.createElement("ul");
  const li1 = document.createElement("li");
  const li2 = document.createElement("li");
  const li3 = document.createElement("li");

  ul.append(li1);
  ul.append(li2);
  ul.append(li3);

  ul.setAttribute("class", "comment-row");
  li1.setAttribute("class", "comment-id");
  li2.setAttribute("class", "comment-content");
  li3.setAttribute("class", "comment-date");

  li1.innerHTML = userid;
  li2.innerHTML = content;
  li3.innerHTML = date;

  return ul;
}

function drawing() {
  commentList.innerHTML = "";
  for (let i = list.length - 1; i >= 0; i--) {
    const row = createRow(list[i].userid, list[i].content, list[i].date);
    commentList.append(row);
  }
}

function totalRecord() {
  total.innerHTML = `(${list.length})`;
}

function commentBtnHandler(e) {
  e.preventDefault();
  const input = e.target.content;
  if (input.value === "") {
    alert("내용을 넣고 등록 버튼을 눌러주세요.");
    return;
  }
  const commentObj = new Comment(input.value);
  list.push(commentObj);
  totalRecord();

  drawing();
  e.target.reset();
}

totalRecord();
commentBtn.addEventListener("submit", commentBtnHandler);
참고
https://developer.mozilla.org/ko/docs/Web/API/Event/preventDefault
https://programming119.tistory.com/100
https://developer.mozilla.org/en-US/docs/Web/API/HTMLFormElement/reset
'Javascript' 카테고리의 다른 글
| [Javascript] 게시판 구현하기 (CRUD) - Read (0) | 2022.11.20 |
|---|---|
| [Javascript] 게시판 구현하기 (CRUD) - Create (0) | 2022.11.19 |
| [Javascript] 로또 번호 생성기 - 버블 정렬 [+전체 코드 수정] (0) | 2022.11.15 |
| [Javascript] Script 태그 위치 (0) | 2022.11.11 |
| [Javascript] Event Object (0) | 2022.11.10 |