no image
[Javascript] 게시판 구현하기 (CRUD) - 코드 수정
이전에 코드에서 새로고침을 할 때 조회수가 증가하는 문제가 생겼다.조회수 증가를 막아보자!추가적으로 수정 시 현재 날짜를 반영하도록 구현해보자!파일 목록📦Board┣ 📂board┃┣ 📜list.html┃ ┣ 📜modify.html┃ ┣ 📜view.html┃ ┗ 📜write.html┣ 📂public┃ ┗ 📂js┃ ┃ ┣ 📜list.js┃ ┃ ┣ 📜modify.js┃ ┃ ┣ 📜view.js┃ ┃ ┗ 📜write.js┗ 📜index.html구현view 페이지에서 새로고침을 할 때 조회수 증가 막기수정 시 현재 날짜 반영게시판 구현게시판 구조view 페이지에서 새로고침을 할 때 조회수 증가 막기나는 새로고침 증가 시 조회수를 막기 위해 boards 데이터에 refresh라는 속성을 추가해..
2022.11.22
no image
[Javascript] 게시판 구현하기 (CRUD) - Delete
이번에는 CRUD의 마지막 기능 Delete 기능을 구현해보자! 파일 목록 📦Board ┣ 📂board ┃┣ 📜list.html ┃ ┣ 📜modify.html ┃ ┣ 📜view.html ┃ ┗ 📜write.html ┣ 📂public ┃ ┗ 📂js ┃ ┃ ┣ 📜list.js ┃ ┃ ┣ 📜modify.js ┃ ┃ ┣ 📜view.js ┃ ┃ ┗ 📜write.js ┗ 📜index.html 구현 구현해야 할 사항은 크게 다음과 같다. 게시물 작성하기 (Create) 리스트로 게시물 보여주기 (Read) 게시물 클릭 시 해당 게시물 보여주기 (Read) 게시물 수정하기 (Update) 게시물 삭제하기 (Delete) 게시판 구현하기 게시판 구조 게시물 삭제하기 (Delete) Delete 기능은 view.js 파일..
2022.11.21
no image
[Javascript] 게시판 구현하기 (CRUD) - Update
오늘은 게시물을 수정 기능을 구현해보자! 파일 목록 📦Board ┣ 📂board ┃┣ 📜list.html ┃ ┣ 📜modify.html ┃ ┣ 📜view.html ┃ ┗ 📜write.html ┣ 📂public ┃ ┗ 📂js ┃ ┃ ┣ 📜list.js ┃ ┃ ┣ 📜modify.js ┃ ┃ ┣ 📜view.js ┃ ┃ ┗ 📜write.js ┗ 📜index.html 구현 구현해야 할 사항은 크게 다음과 같다. 게시물 작성하기 (Create) 리스트로 게시물 보여주기 (Read) 게시물 클릭 시 해당 게시물 보여주기 (Read) 게시물 수정하기 (Update) 게시물 삭제하기 (Delete) 게시판 구현하기 게시판 구조 게시물 수정하기 (Update) # public/js/view.js 먼저 view 페이지에서 ..
2022.11.21
no image
[Javascript] 게시판 구현하기 (CRUD) - Read
오늘은 이전에 만들었던 게시판에 list 페이지와 view 페이지를 만들어 보자! 파일 목록 📦Board ┣ 📂board ┃┣ 📜list.html ┃ ┣ 📜modify.html ┃ ┣ 📜view.html ┃ ┗ 📜write.html ┣ 📂public ┃ ┗ 📂js ┃ ┃ ┣ 📜list.js ┃ ┃ ┣ 📜modify.js ┃ ┃ ┣ 📜view.js ┃ ┃ ┗ 📜write.js ┗ 📜index.html 구현 구현해야 할 사항은 크게 다음과 같다. 게시물 작성하기 (Create) 리스트로 게시물 보여주기 (Read) 게시물 클릭 시 해당 게시물 보여주기 (Read) 게시물 수정하기 (Update) 게시물 삭제하기 (Delete) 게시판 구현하기 게시판 구조 리스트로 게시물 보여주기 (Read) # public..
2022.11.20
no image
[Javascript] 게시판 구현하기 (CRUD) - Create
오늘은 게시판 만들어 보자! 이번에는 HTML과 Javascript 파일을 용도에 맞게 분리해서 작성할 예정이다. 이렇게 되면 다른 Javascript 파일에서 사용하는 변수와 데이터들은 이름이 다른 Javascript 파일에서 사용할 수 없다. 그래서 브라우저의 localStorage를 이용할 예정이다. 파일 목록 📦Board ┣ 📂board ┃┣ 📜list.html ┃ ┣ 📜modify.html ┃ ┣ 📜view.html ┃ ┗ 📜write.html ┣ 📂public ┃ ┗ 📂js ┃ ┃ ┣ 📜list.js ┃ ┃ ┣ 📜modify.js ┃ ┃ ┣ 📜view.js ┃ ┃ ┗ 📜write.js ┗ 📜index.html 구현 구현해야 할 사항은 크게 다음과 같다. 게시물 작성하기 (Create) 리스트로..
2022.11.19
no image
[Javascript] 댓글 구현하기 (Create, Read)
작업 내용 댓글을 구현하기 위한 CRUD 중 C와 R을 구현해 보자! 다음은 구현해야 할 내용이다. 댓글 입력 (Create) 댓글 입력 폼에 내용을 입력한 뒤 submit을 누르면 리스트에 추가된다. 입력 폼이 비어있는 상태에서 submit을 누르면 경고 팝업을 띄운다. 댓글을 성공적으로 처리하면 입력 폼을 reset 한다. 입력한 값을 아이디, 댓글 내용, 날짜 형태로 된 객체로 만들어 리스트에 넣는다. 댓글 출력 (Read) 댓글 내용은 아이디, 댓글 내용, 날짜로 표현한다. 댓글 리스트는 최신순으로 나타낸다. 댓글 총 개수를 표시한다. 구현 HTML / CSS 일단 HTML과 CSS는 미리 구현되어 있는 걸 사용한다. Javascript로 Create와 Read를 구현하는데 집중하자! # prac..
2022.11.16
no image
[Javascript] 로또 번호 생성기 - 버블 정렬 [+전체 코드 수정]
이번에는 이전에 만들었던 로또 번호 생성기에 정렬 기능을 추가하고 전체적으로 코드 수정을 해보았다. 추가로 로또의 보너스 번호도 추가해 보았다. 먼저 정렬 알고리즘에 대해서 알아보고 가자! 정렬 알고리즘 정렬(Sorting)이란 데이터를 특정한 기준에 따라서 순서대로 나열하는 것을 말한다. 사람들은 정렬을 쉽게 할 수 있지만 컴퓨터에게는 쉬운 일은 아니다. 컴퓨터는 사람과 다르게 규칙성을 알지 못하기 때문에 우리가 코드를 잘 짜줘야 한다. 정렬 알고리즘의 종류는 다양하다. 버블 정렬, 선택 정렬, 삽입 정렬, 퀵 정렬, 계수 정렬 등이 있다. 이 중에서 나는 오늘 배운 버블 정렬을 사용해 보았다. 찾아보니 버블 정렬이 가장 효율이 좋지 않은 정렬이라고 한다. 하지만 초보자가 이해하기 쉽고 코드가 짧은 장..
2022.11.15
no image
[Javascript] Script 태그 위치
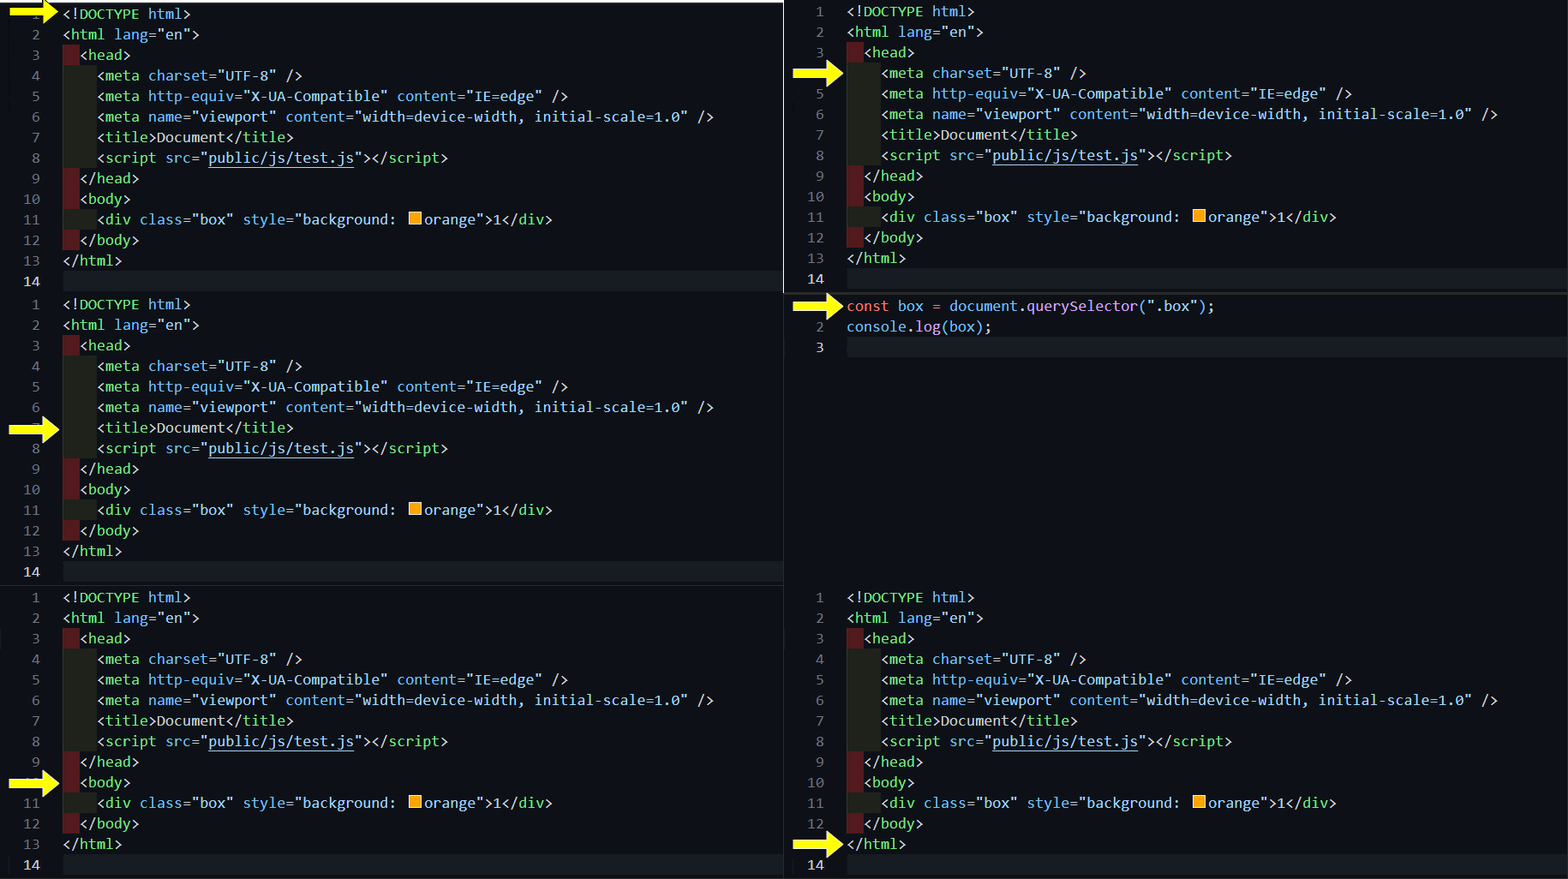
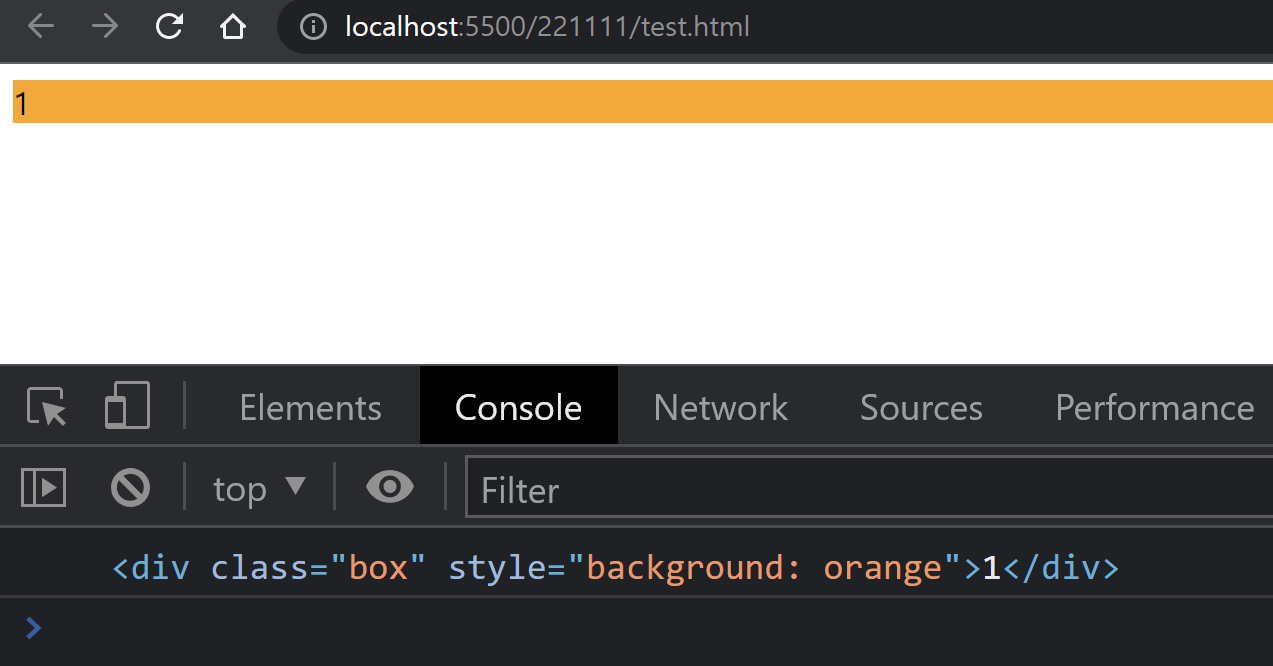
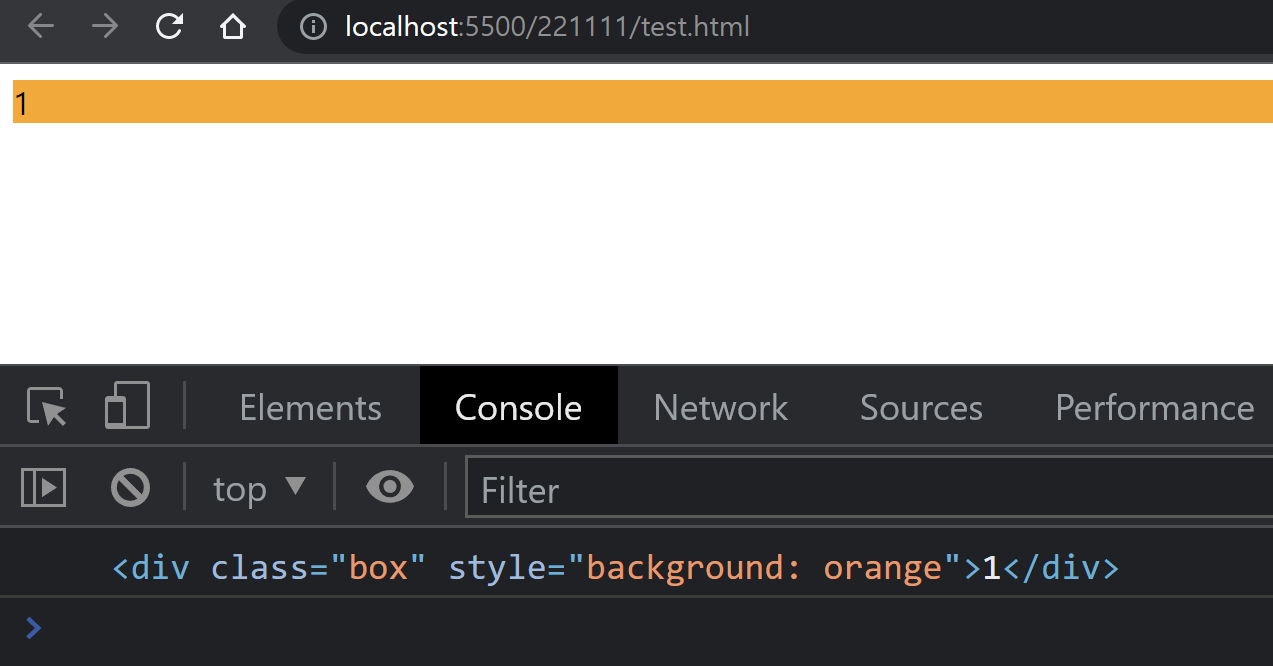
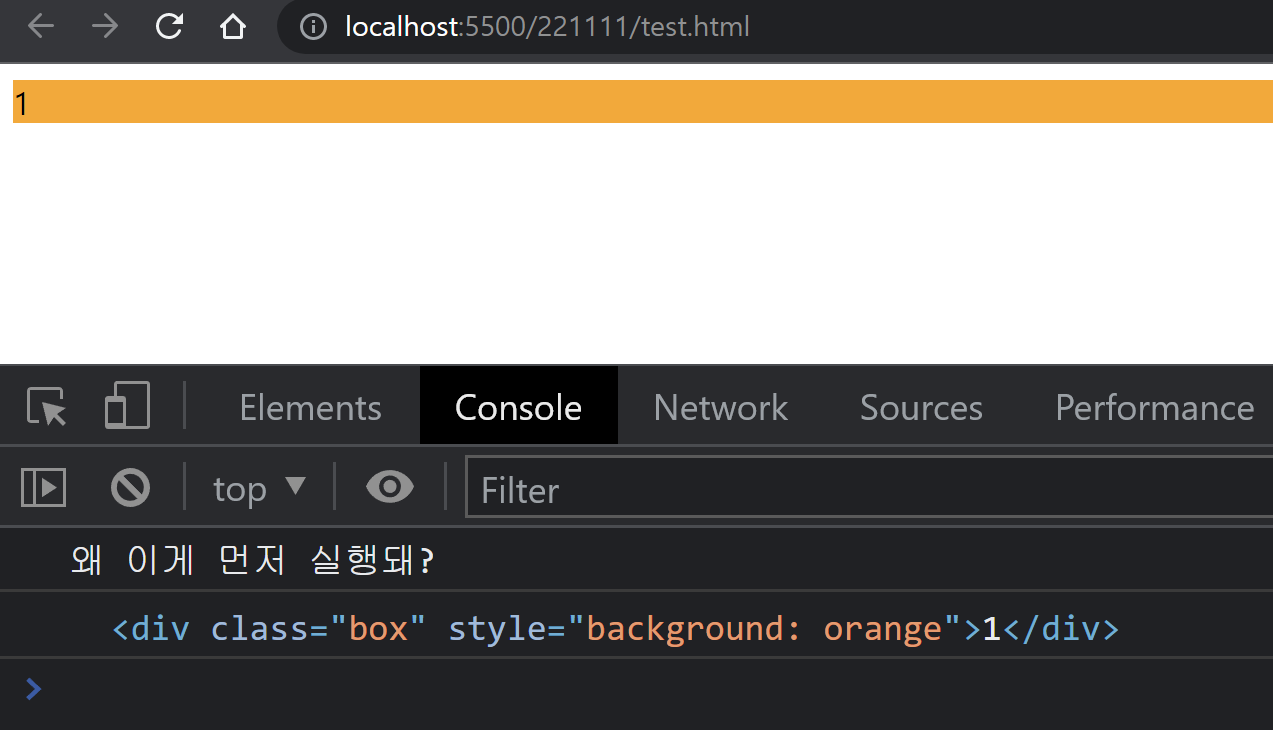
HTML 문서에서 Javascript 파일을 연결하기 위해서 script 태그를 사용한다. HTML 문서에서 어느 곳에든 사용해도 되는데 위치에 따라 동작의 차이가 발생할 수 있다. 이는 브라우저의 동작 방식과 연관이 있다. 브라우저의 동작 방식 1 const box = document.querySelector(".box"); console.log(box); 브라우저는 다음과 같이 HTML 파일을 읽게 된다. 브라우저는 HTML 파일을 위에서부터 아래로 읽게 되는데 코드를 읽는 도중 script 태그를 만나게 되면 Javascript 파일을 불러와 읽고 실행한 다음에 다시 나머지 HTML 파일을 읽게 된다. Javascript를 읽을 당시에는 class 명이 box인 요소를 찾을 수 없기 때문에 null..
2022.11.11

이전에 코드에서 새로고침을 할 때 조회수가 증가하는 문제가 생겼다.

조회수 증가를 막아보자!

추가적으로 수정 시 현재 날짜를 반영하도록 구현해보자!

파일 목록

📦Board
┣ 📂board
┃┣ 📜list.html
┃ ┣ 📜modify.html
┃ ┣ 📜view.html
┃ ┗ 📜write.html
┣ 📂public
┃ ┗ 📂js
┃ ┃ ┣ 📜list.js
┃ ┃ ┣ 📜modify.js
┃ ┃ ┣ 📜view.js
┃ ┃ ┗ 📜write.js
┗ 📜index.html

구현

  • view 페이지에서 새로고침을 할 때 조회수 증가 막기
  • 수정 시 현재 날짜 반영

게시판 구현

게시판 구조

게시판 구조

view 페이지에서 새로고침을 할 때 조회수 증가 막기

나는 새로고침 증가 시 조회수를 막기 위해 boards 데이터에 refresh라는 속성을 추가해 주었다.

# public/js/write.js


const writeFrm = document.querySelector("#writeFrm");

// 데이터 기본 틀
class Board {
  constructor(indexNum, subjectStr, writerStr, contentStr) {
    this.index = indexNum;
    this.Subject = subjectStr;
    this.Writer = writerStr;
    this.Content = contentStr;
    this.date = recordDate();
    this.views = -1;
    this.refresh = false; // 추가된 부분
  }

  // 값 설정시 빈 값 체크
  set Subject(value) {
    if (value.length === 0) throw new Error("제목을 입력해주세요.");
    this.subject = value;
  }

  set Writer(value) {
    if (value.length === 0) throw new Error("작성자를 입력해주세요.");
    this.writer = value;
  }

  set Content(value) {
    if (value.length === 0) throw new Error("내용을 입력해주세요.");
    this.content = value;
  }
}

초기에 views속성을 처음에 -1로 설정해주고 refresh 속성을 false로 설정해주었다.

views 속성을 -1로 설정한 이유와 refresh 속성을 false로 설정한 이유는 view.js 코드에서 설명하겠다.

// 현재 날짜 반환 함수
const recordDate = () => {
  const date = new Date();
  const yyyy = date.getFullYear();
  let mm = date.getMonth() + 1;
  let dd = date.getDate();

  mm = (mm > 9 ? "" : 0) + mm;
  dd = (dd > 9 ? "" : 0) + dd;

  const arr = [yyyy, mm, dd];

  return arr.join("-");
};

// 글작성 버튼
const submitHandler = (e) => {
  e.preventDefault();
  const subject = e.target.subject.value;
  const writer = e.target.writer.value;
  const content = e.target.content.value;

  try {
    // boards 가져오기
    const boardsObj = JSON.parse(localStorage.getItem("boards"));

    // 객체 추가
    const index = boardsObj.length;
    const instance = new Board(index, subject, writer, content);
    boardsObj.push(instance);

    // boards 저장
    const boardsStr = JSON.stringify(boardsObj);
    localStorage.setItem("boards", boardsStr);
    location.href = "/board/view.html?index=" + index;
  } catch (e) {
    // 예외 발생시 메시지 출력
    alert(e.message);
    console.error(e);
  }
};

writeFrm.addEventListener("submit", submitHandler);

# public/js/list.js

let boardsStr = localStorage.getItem("boards");

// localStorage 초기값 지정
if (boardsStr === null) {
  const listStr = JSON.stringify([]);
  localStorage.setItem("boards", listStr);
  boardsStr = listStr;
}

const boardsObj = JSON.parse(boardsStr);

// 템플릿 생성
const template = (index, objValue) => {
  return `
  <tr>
  <td>${index + 1}</td>
  <td><a href="/board/view.html?index=${objValue.index}">${objValue.subject}</a></td>
  <td>${objValue.writer}</td>
  <td>${objValue.date}</td>
  <td>${objValue.views}</td>
  </tr>
  `;
};

// 템플릿 반영
const tbody = document.querySelector("tbody");

for (let i = 0; i < boardsObj.length; i++) {
  tbody.innerHTML += template(i, boardsObj[i]);
  // 추가된 부분
  boardsObj[i].refresh = false;
  const refreshStr = JSON.stringify(boardsObj);
  localStorage.setItem("boards", refreshStr);
}


list 페이지에서 게시글 목록을 출력해줄 때 boards 객체의 refresh 속성을 모두 false로 바꿔서 localStorage에 반영을 해준다.

그 이유는 view.js 부분에서 설명하도록 하겠다.

# public/js/view.js

const boardsStr = localStorage.getItem("boards");
const boardsObj = JSON.parse(boardsStr);

const idx = location.search;
const index = idx.split("=")[1];
const board = boardsObj[index];

const beforeUrl = document.referrer;

// 조회수 수정된 부분
if (!board.refresh) {
  board.views++;
  board.refresh = true;
  const viewCountStr = JSON.stringify(boardsObj);
  localStorage.setItem("boards", viewCountStr);
} else {
  if (beforeUrl === " ") {
    board.views++;
    const viewCountStr = JSON.stringify(boardsObj);
    localStorage.setItem("boards", viewCountStr);
  }
}

만약 boards 데이터의 refresh가 false라면 조회수를 1 증가시키고 localStorage에 반영한다.

wirte.js에서 글을 작성하면 view 페이지로 넘어오게 되는데 이때 값이 1이 증가하게 되기 때문에 write.js에서 views의 초기값을 -1로 설정해주었다.

이렇게 하면 작성하고 view 페이지로 넘어오면 조회수가 0부터 시작한다.

만약 refresh 가 false라면 list 페이지에서 왔다고 보고 조회수를 1 증가시킨 뒤 boards 데이터의 refresh 속성을 true 바꾼다.

새로고침을 하게 되면 view.js 파일을 다시 로드하게 되는데 boards의 refresh 속성이 true이기 때문에 조회수가 증가하지 않는다. 

예외로 이전 url이 빈 값인 url 즉 url에 직접 입력해서 들어온 경우 조회수를 1 증가시킨다.

이 경우에도 새로고침을 해도 조회수가 증가하지 않는다.

// 데이터 출력
const viewFrm = document.querySelectorAll("#viewFrm > div");

for (let i = 0; i < viewFrm.length; i++) {
  const id = viewFrm[i].id;
  viewFrm[i].innerHTML += " " + board[id];
}

// 수정 버튼
const modifyBtn = document.querySelector("#modify");

const modifyBtnHandler = (e) => {
  location = "/board/modify.html" + idx;
};

modifyBtn.addEventListener("click", modifyBtnHandler);

// 삭제 버튼
const deleteBtn = document.querySelector("#delete");

const deleteBtnHandler = (e) => {
  boardsObj.splice(index, 1);
  for (let i = 0; i < boardsObj.length; i++) {
    boardsObj[i].index = i;
  }

  const setBoardsStr = JSON.stringify(boardsObj);
  localStorage.setItem("boards", setBoardsStr);
  location.href = "/board/list.html";
};

deleteBtn.addEventListener("click", deleteBtnHandler);

수정 시 현재 날짜 반영

const modifyFrm = document.querySelector("#modifyFrm");
const modifyFrmList = document.querySelectorAll("#modifyFrm > div");
const idx = location.search;
const index = location.search.split("=")[1];
const boardsObj = JSON.parse(localStorage.getItem("boards"));
const board = boardsObj[index];

// 게시글의 데이터 값 출력
for (let i = 0; i < modifyFrmList.length; i++) {
  const element = modifyFrmList[i].childNodes[1];
  const id = element.name;
  element.value = board[id];
}

// 작성한 입력 값이 빈 값인지 검사
const isEmpty = (subject, writer, content) => {
  if (subject.length === 0) throw new Error("제목을 입력해주세요");
  if (writer.length === 0) throw new Error("작성자를 입력해주세요");
  if (content.length === 0) throw new Error("내용을 입력해주세요");
};

// 현재 날짜 반환 함수
const recordDate = () => {
  const date = new Date();
  const yyyy = date.getFullYear();
  let mm = date.getMonth() + 1;
  let dd = date.getDate();

  mm = (mm > 9 ? "" : 0) + mm;
  dd = (dd > 9 ? "" : 0) + dd;

  const arr = [yyyy, mm, dd];

  return arr.join("-");
};

이전에 write.js에서 사용한 현재 날짜를 반환해주는 함수인 recordDate를 사용하였다.

// 수정완료 버튼
const modifyHandler = (e) => {
  e.preventDefault();
  const subject = e.target.subject.value;
  const writer = e.target.writer.value;
  const content = e.target.content.value;

  try {
    isEmpty(subject, writer, content);
    board.subject = subject;
    board.writer = writer;
    board.content = content;
    board.date = recordDate();

    const boardsStr = JSON.stringify(boardsObj);
    localStorage.setItem("boards", boardsStr);
    location.href = "/board/view.html" + idx;
  } catch (e) {
    alert(e.message);
    console.error(e);
  }
};

수정 완료 버튼을  누르면 recordDate함수를 호출해 반환 값을 boards의 데이터에 덮어쓰도록 구현하였다.

const backBtn = document.querySelector("#back");

// 뒤로가기 버튼
const backBtnHandler = (e) => {
  location.href = document.referrer;
};

modifyFrm.addEventListener("submit", modifyHandler);
backBtn.addEventListener("click", backBtnHandler);

게시판 구경하기

최종 결과물  👈 클릭

이번에는 CRUD의 마지막 기능 Delete 기능을 구현해보자!

파일 목록

📦Board
┣ 📂board
┃┣ 📜list.html
┃ ┣ 📜modify.html
┃ ┣ 📜view.html
┃ ┗ 📜write.html
┣ 📂public
┃ ┗ 📂js
┃ ┃ ┣ 📜list.js
┃ ┃ ┣ 📜modify.js
┃ ┃ ┣ 📜view.js
┃ ┃ ┗ 📜write.js
┗ 📜index.html

구현

구현해야 할 사항은 크게 다음과 같다.

  • 게시물 작성하기 (Create)
  • 리스트로 게시물 보여주기 (Read)
  • 게시물 클릭 시 해당 게시물 보여주기 (Read)
  • 게시물 수정하기 (Update)
  • 게시물 삭제하기 (Delete)

게시판 구현하기

게시판 구조

게시판 구조

게시물 삭제하기 (Delete)

Delete 기능은 view.js 파일에서 구현할 예정이다.

delete.js 파일을 따로 만들지 않은 이유는 view 페이지에서 삭제하고 list 페이지로 넘어가기만 하면 되는데 따로 파일을 만들 이유가 없다고 개인적으로 생각을 했기 때문이다.


# public/js/view.js

제일 먼저 view 페이지의 삭제 버튼을 선택해 보자!

이전 코드에서 작업을 진행한다.

const boardsStr = localStorage.getItem("boards");
const boardsObj = JSON.parse(boardsStr);

const idx = location.search;
const index = idx.split("=")[1];
const board = boardsObj[index];

const beforeUrl = document.referrer;

// 조회수
const viewCount = (beforeUrl) => {
  if (beforeUrl.split("/").pop() === "list.html") {
    board.views++;
    const viewCountStr = JSON.stringify(boardsObj);
    localStorage.setItem("boards", viewCountStr);
  }
};

viewCount(beforeUrl);

// 데이터 출력
const viewFrm = document.querySelectorAll("#viewFrm > div");

for (let i = 0; i < viewFrm.length; i++) {
  const id = viewFrm[i].id;
  viewFrm[i].innerHTML += " " + board[id];
}

// 수정 버튼
const modifyBtn = document.querySelector("#modify");

const modifyBtnHandler = (e) => {
  location = "/board/modify.html" + idx;
};

modifyBtn.addEventListener("click", modifyBtnHandler);

// 삭제 버튼
const deleteBtn = document.querySelector("#delete");
console.log(deleteBtn);

삭제 버튼 요소를 선택한 결과

이제 삭제 버튼에 클릭 이벤트를 걸어보자!

const boardsStr = localStorage.getItem("boards");
const boardsObj = JSON.parse(boardsStr);

const idx = location.search;
const index = idx.split("=")[1];
const board = boardsObj[index];

const beforeUrl = document.referrer;

// 조회수
const viewCount = (beforeUrl) => {
  if (beforeUrl.split("/").pop() === "list.html") {
    board.views++;
    const viewCountStr = JSON.stringify(boardsObj);
    localStorage.setItem("boards", viewCountStr);
  }
};

viewCount(beforeUrl);

// 데이터 출력
const viewFrm = document.querySelectorAll("#viewFrm > div");

for (let i = 0; i < viewFrm.length; i++) {
  const id = viewFrm[i].id;
  viewFrm[i].innerHTML += " " + board[id];
}

// 수정 버튼
const modifyBtn = document.querySelector("#modify");

const modifyBtnHandler = (e) => {
  location = "/board/modify.html" + idx;
};

modifyBtn.addEventListener("click", modifyBtnHandler);

// 삭제 버튼
const deleteBtn = document.querySelector("#delete");

const deleteBtnHandler = (e) => {
  console.log(e.target);
};

deleteBtn.addEventListener("click", deleteBtnHandler);

삭제 버튼을 클릭한 결과

쿼리 스트링으로 전달받은 인덱스를 이용해 버튼을 클릭하면 해당하는 데이터를 splice로 삭제해보자!

const boardsStr = localStorage.getItem("boards");
const boardsObj = JSON.parse(boardsStr);

const idx = location.search;
const index = idx.split("=")[1];
const board = boardsObj[index];

const beforeUrl = document.referrer;

// 조회수
const viewCount = (beforeUrl) => {
  if (beforeUrl.split("/").pop() === "list.html") {
    board.views++;
    const viewCountStr = JSON.stringify(boardsObj);
    localStorage.setItem("boards", viewCountStr);
  }
};

viewCount(beforeUrl);

// 데이터 출력
const viewFrm = document.querySelectorAll("#viewFrm > div");

for (let i = 0; i < viewFrm.length; i++) {
  const id = viewFrm[i].id;
  viewFrm[i].innerHTML += " " + board[id];
}

// 수정 버튼
const modifyBtn = document.querySelector("#modify");

const modifyBtnHandler = (e) => {
  location = "/board/modify.html" + idx;
};

modifyBtn.addEventListener("click", modifyBtnHandler);

// 삭제 버튼
const deleteBtn = document.querySelector("#delete");

console.log(boardsObj);
const deleteBtnHandler = (e) => {
  boardsObj.splice(index, 1);
  console.log(boardsObj);
};

deleteBtn.addEventListener("click", deleteBtnHandler);

boards 데이터 삭제하기

0번째 인덱스에 해당하는 값이 잘 지워지는 걸 확인할 수 있다.

이번에는 인덱스 값을 앞으로 한 칸씩 당겨주자!

const boardsStr = localStorage.getItem("boards");
const boardsObj = JSON.parse(boardsStr);

const idx = location.search;
const index = idx.split("=")[1];
const board = boardsObj[index];

const beforeUrl = document.referrer;

// 조회수
const viewCount = (beforeUrl) => {
  if (beforeUrl.split("/").pop() === "list.html") {
    board.views++;
    const viewCountStr = JSON.stringify(boardsObj);
    localStorage.setItem("boards", viewCountStr);
  }
};

viewCount(beforeUrl);

// 데이터 출력
const viewFrm = document.querySelectorAll("#viewFrm > div");

for (let i = 0; i < viewFrm.length; i++) {
  const id = viewFrm[i].id;
  viewFrm[i].innerHTML += " " + board[id];
}

// 수정 버튼
const modifyBtn = document.querySelector("#modify");

const modifyBtnHandler = (e) => {
  location = "/board/modify.html" + idx;
};

modifyBtn.addEventListener("click", modifyBtnHandler);

// 삭제 버튼
const deleteBtn = document.querySelector("#delete");

console.log(boardsObj);
const deleteBtnHandler = (e) => {
  boardsObj.splice(index, 1);
  for (let i = 0; i < boardsObj.length; i++) {
    boardsObj[i].index = i;
  }
  console.log(boardsObj);
};

deleteBtn.addEventListener("click", deleteBtnHandler);

boards 데이터 삭제 후 인덱스 정렬

이제 이걸 localStorage에 반영하자!

const boardsStr = localStorage.getItem("boards");
const boardsObj = JSON.parse(boardsStr);

const idx = location.search;
const index = idx.split("=")[1];
const board = boardsObj[index];

const beforeUrl = document.referrer;

// 조회수
const viewCount = (beforeUrl) => {
  if (beforeUrl.split("/").pop() === "list.html") {
    board.views++;
    const viewCountStr = JSON.stringify(boardsObj);
    localStorage.setItem("boards", viewCountStr);
  }
};

viewCount(beforeUrl);

// 데이터 출력
const viewFrm = document.querySelectorAll("#viewFrm > div");

for (let i = 0; i < viewFrm.length; i++) {
  const id = viewFrm[i].id;
  viewFrm[i].innerHTML += " " + board[id];
}

// 수정 버튼
const modifyBtn = document.querySelector("#modify");

const modifyBtnHandler = (e) => {
  location = "/board/modify.html" + idx;
};

modifyBtn.addEventListener("click", modifyBtnHandler);

// 삭제 버튼
const deleteBtn = document.querySelector("#delete");

const deleteBtnHandler = (e) => {
  boardsObj.splice(index, 1);
  for (let i = 0; i < boardsObj.length; i++) {
    boardsObj[i].index = i;
  }

  const setBoardsStr = JSON.stringify(boardsObj);
  localStorage.setItem("boards", setBoardsStr);
};

deleteBtn.addEventListener("click", deleteBtnHandler);

삭제한 결과를 localStorage에 반영하기

마지막으로 삭제 버튼을 누르면 list 페이지로 이동하게 해 보자!

방금 데이터는 삭제되었기 때문에 list 페이지에서 새로운 게시글을 선택해서 view 페이지로 온 다음 작업을 진행하자!

const boardsStr = localStorage.getItem("boards");
const boardsObj = JSON.parse(boardsStr);

const idx = location.search;
const index = idx.split("=")[1];
const board = boardsObj[index];

const beforeUrl = document.referrer;

// 조회수
const viewCount = (beforeUrl) => {
  if (beforeUrl.split("/").pop() === "list.html") {
    board.views++;
    const viewCountStr = JSON.stringify(boardsObj);
    localStorage.setItem("boards", viewCountStr);
  }
};

viewCount(beforeUrl);

// 데이터 출력
const viewFrm = document.querySelectorAll("#viewFrm > div");

for (let i = 0; i < viewFrm.length; i++) {
  const id = viewFrm[i].id;
  viewFrm[i].innerHTML += " " + board[id];
}

// 수정 버튼
const modifyBtn = document.querySelector("#modify");

const modifyBtnHandler = (e) => {
  location = "/board/modify.html" + idx;
};

modifyBtn.addEventListener("click", modifyBtnHandler);

// 삭제 버튼
const deleteBtn = document.querySelector("#delete");

const deleteBtnHandler = (e) => {
  boardsObj.splice(index, 1);
  for (let i = 0; i < boardsObj.length; i++) {
    boardsObj[i].index = i;
  }

  const setBoardsStr = JSON.stringify(boardsObj);
  localStorage.setItem("boards", setBoardsStr);
  location.href = "/board/list.html";
};

deleteBtn.addEventListener("click", deleteBtnHandler);

게시물이 삭제되는 모습

이로써 게시판 구현하기가 끝이 났다!!!


실제 게시판은 데이터 베이스를 이용하겠지만 아직 데이터 베이스를 배우지 않아서 브라우저의 localStorage를 이용해서 게시판을 구현해 보았다.

나중에 데이터 베이스를 배우고 나면 데이터 베이스를 이용해서 게시판을 구현해 보자!

게시판 구경하기

최종 결과물  👈 클릭

# 실행결과 로컬에서는 새로고침을 해도 조회수가 올라가지 않았는데 조회수가 올라가는 문제가 있다. 

# 이 부분을 수정해봐야겠다.


오늘은 게시물을 수정 기능을 구현해보자!

파일 목록

📦Board
┣ 📂board
┃┣ 📜list.html
┃ ┣ 📜modify.html
┃ ┣ 📜view.html
┃ ┗ 📜write.html
┣ 📂public
┃ ┗ 📂js
┃ ┃ ┣ 📜list.js
┃ ┃ ┣ 📜modify.js
┃ ┃ ┣ 📜view.js
┃ ┃ ┗ 📜write.js
┗ 📜index.html

구현

구현해야 할 사항은 크게 다음과 같다.

  • 게시물 작성하기 (Create)
  • 리스트로 게시물 보여주기 (Read)
  • 게시물 클릭 시 해당 게시물 보여주기 (Read)
  • 게시물 수정하기 (Update)
  • 게시물 삭제하기 (Delete)

게시판 구현하기

게시판 구조

게시판 구조

게시물 수정하기 (Update)

# public/js/view.js

먼저 view 페이지에서 수정 버튼을 누르면 modify 페이지로 이동하도록 만들어 보자!

클릭 이벤트를 걸 요소를 선택해보자!

const boardsStr = localStorage.getItem("boards");
const boardsObj = JSON.parse(boardsStr);

const idx = location.search;
const index = idx.split("=")[1];
const board = boardsObj[index];

const beforeUrl = document.referrer;

const viewCount = (beforeUrl) => {
  if (beforeUrl.split("/").pop() === "list.html") {
    board.views++;
    const viewCountStr = JSON.stringify(boardsObj);
    localStorage.setItem("boards", viewCountStr);
  }
};

viewCount(beforeUrl);

const viewFrm = document.querySelectorAll("#viewFrm > div");

for (let i = 0; i < viewFrm.length; i++) {
  const id = viewFrm[i].id;
  viewFrm[i].innerHTML += " " + board[id];
}

const modifyBtn = document.querySelector("#modify");
console.log(modifyBtn);

view 페이지에서 수정 버튼을 선택한 결과

수정 버튼에 클릭 이벤트를 걸어주고 확인을 해보자!

const boardsStr = localStorage.getItem("boards");
const boardsObj = JSON.parse(boardsStr);

const idx = location.search;
const index = idx.split("=")[1];
const board = boardsObj[index];

const beforeUrl = document.referrer;

const viewCount = (beforeUrl) => {
  if (beforeUrl.split("/").pop() === "list.html") {
    board.views++;
    const viewCountStr = JSON.stringify(boardsObj);
    localStorage.setItem("boards", viewCountStr);
  }
};

viewCount(beforeUrl);

const viewFrm = document.querySelectorAll("#viewFrm > div");

for (let i = 0; i < viewFrm.length; i++) {
  const id = viewFrm[i].id;
  viewFrm[i].innerHTML += " " + board[id];
}

const modifyBtn = document.querySelector("#modify");

const modifyBtnHandler = (e) => {
  console.log("수정");
};

modifyBtn.addEventListener("click", modifyBtnHandler);

수정 버튼에 이벤트가 잘 걸린지 확인

다음과 같이 modify 페이지로 이동시켜줄 때 매개변수로 index라는 키와 게시글의 index 번호를 넘겨준다.

const boardsStr = localStorage.getItem("boards");
const boardsObj = JSON.parse(boardsStr);

const idx = location.search;
const index = idx.split("=")[1];
const board = boardsObj[index];

const beforeUrl = document.referrer;

const viewCount = (beforeUrl) => {
  if (beforeUrl.split("/").pop() === "list.html") {
    board.views++;
    const viewCountStr = JSON.stringify(boardsObj);
    localStorage.setItem("boards", viewCountStr);
  }
};

viewCount(beforeUrl);

const viewFrm = document.querySelectorAll("#viewFrm > div");

for (let i = 0; i < viewFrm.length; i++) {
  const id = viewFrm[i].id;
  viewFrm[i].innerHTML += " " + board[id];
}

const modifyBtn = document.querySelector("#modify");

const modifyBtnHandler = (e) => {
  location = "/board/modify.html" + idx;
};

modifyBtn.addEventListener("click", modifyBtnHandler);

view 페이지에서 modify 페이지로 넘어가는 모습

이제 modify 페이지로 이동해서 작업을 진행한다.


# public/js/modify.js

modify 페이지는 write 페이지와 view 페이지가 합쳐진 페이지라 볼 수 있다.

submit 이벤트를 걸기 위한 요소를 선택한다.

그리고 데이터가 들어갈 위치인 modifyFrm > div 요소들 선택해 준다.

const modifyFrm = document.querySelector("#modifyFrm");
const modifyFrmList = document.querySelectorAll("#modifyFrm > div");
console.log(modifyFrm);
console.log(modifyFrmList);

boards의 데이터가 들어갈 위치 확인

modify 페이지에 수정 완료 버튼에 submit 이벤트를 걸어준다.

submit의 기본 이벤트를 막아주고 이벤트가 잘 작동하는지 출력해본다.

const modifyFrm = document.querySelector("#modifyFrm");
const modifyFrmList = document.querySelectorAll("#modifyFrm > div");

const modifyHandler = (e) => {
  e.preventDefault();
  console.log("Hello");
};

modifyFrm.addEventListener("submit", modifyHandler);

submit 이벤트 작동확인

boards 데이터를 가져온다.

const modifyFrm = document.querySelector("#modifyFrm");
const modifyFrmList = document.querySelectorAll("#modifyFrm > div");
const boardsObj = JSON.parse(localStorage.getItem("boards"));

console.log(boardsObj);

const modifyHandler = (e) => {
  e.preventDefault();
};

modifyFrm.addEventListener("submit", modifyHandler);

boards에 저장된 데이터 확인

location.search를 이용해 이전 페이지에서 넘겨준 인덱스를 받아온다.

인덱스를 이용해 수정하려는 데이터를 확인해보자!

const modifyFrm = document.querySelector("#modifyFrm");
const modifyFrmList = document.querySelectorAll("#modifyFrm > div");
const idx = location.search;
console.log(idx);
const index = location.search.split("=")[1];
console.log(index);
const boardsObj = JSON.parse(localStorage.getItem("boards"));
const board = boardsObj[index];
console.log(board);

const modifyHandler = (e) => {
  e.preventDefault();
};

modifyFrm.addEventListener("submit", modifyHandler);

넘겨받은 인덱스 확인 및 수정할 데이터 확인

수정하기 전 데이터가 미리 들어가야 할 위치를 찾아보자!

const modifyFrm = document.querySelector("#modifyFrm");
const modifyFrmList = document.querySelectorAll("#modifyFrm > div");
const idx = location.search;
const index = location.search.split("=")[1];
const boardsObj = JSON.parse(localStorage.getItem("boards"));
const board = boardsObj[index];

for (let i = 0; i < modifyFrmList.length; i++) {
  const element = modifyFrmList[i].childNodes;
  console.log(element);
}

const modifyHandler = (e) => {
  e.preventDefault();
};

modifyFrm.addEventListener("submit", modifyHandler);

저장되어 있던 boards의 데이터가 들어갈 공간

찾은 위치에 수정하기 전 데이터를 넣어보자!

const modifyFrm = document.querySelector("#modifyFrm");
const modifyFrmList = document.querySelectorAll("#modifyFrm > div");
const idx = location.search;
const index = location.search.split("=")[1];
const boardsObj = JSON.parse(localStorage.getItem("boards"));
const board = boardsObj[index];

console.log(boardsObj[index]);
for (let i = 0; i < modifyFrmList.length; i++) {
  const element = modifyFrmList[i].childNodes[1];
  const id = element.name;
  element.value = board[id];
}

const modifyHandler = (e) => {
  e.preventDefault();
};

modifyFrm.addEventListener("submit", modifyHandler);

boards의 데이터가 위치에 맞게 들어간 모습

글을 작성하고 수정완료를 눌렀을 때 input 박스와 textarea의 값들을 가져와보자!

const modifyFrm = document.querySelector("#modifyFrm");
const modifyFrmList = document.querySelectorAll("#modifyFrm > div");
const idx = location.search;
const index = location.search.split("=")[1];
const boardsObj = JSON.parse(localStorage.getItem("boards"));
const board = boardsObj[index];

for (let i = 0; i < modifyFrmList.length; i++) {
  const element = modifyFrmList[i].childNodes[1];
  const id = element.name;
  element.value = board[id];
}

const modifyHandler = (e) => {
  e.preventDefault();
  const subject = e.target.subject.value;
  const writer = e.target.writer.value;
  const content = e.target.content.value;

  console.log(subject, writer, content);
};

modifyFrm.addEventListener("submit", modifyHandler);

수정된 데이터를 저장하기전 값을 확인하는 모습

값들을 저장하기 이전에 빈 값이 있는지 체크하는 함수를 만들어 보자!

const modifyFrm = document.querySelector("#modifyFrm");
const modifyFrmList = document.querySelectorAll("#modifyFrm > div");
const idx = location.search;
const index = location.search.split("=")[1];
const boardsObj = JSON.parse(localStorage.getItem("boards"));
const board = boardsObj[index];

for (let i = 0; i < modifyFrmList.length; i++) {
  const element = modifyFrmList[i].childNodes[1];
  const id = element.name;
  element.value = board[id];
}

const isEmpty = (subject, writer, content) => {
  if (subject.length === 0) throw new Error("제목을 입력해주세요");
  if (writer.length === 0) throw new Error("작성자를 입력해주세요");
  if (content.length === 0) throw new Error("내용을 입력해주세요");
};

const modifyHandler = (e) => {
  e.preventDefault();
  const subject = e.target.subject.value;
  const writer = e.target.writer.value;
  const content = e.target.content.value;

  try {
    isEmpty(subject, writer, content);
  } catch (e) {
    alert(e.message);
    console.error(e);
  }
};

modifyFrm.addEventListener("submit", modifyHandler);

빈 값을 체크하는 함수 실행 결과

이제 수정한 값을 boards 데이터에 저장하고 view 페이지로 이동할 수 있도록 만들어 보자!

const modifyFrm = document.querySelector("#modifyFrm");
const modifyFrmList = document.querySelectorAll("#modifyFrm > div");
const idx = location.search;
const index = location.search.split("=")[1];
const boardsObj = JSON.parse(localStorage.getItem("boards"));
const board = boardsObj[index];

for (let i = 0; i < modifyFrmList.length; i++) {
  const element = modifyFrmList[i].childNodes[1];
  const id = element.name;
  element.value = board[id];
}

const isEmpty = (subject, writer, content) => {
  if (subject.length === 0) throw new Error("제목을 입력해주세요");
  if (writer.length === 0) throw new Error("작성자를 입력해주세요");
  if (content.length === 0) throw new Error("내용을 입력해주세요");
};

const modifyHandler = (e) => {
  e.preventDefault();
  const subject = e.target.subject.value;
  const writer = e.target.writer.value;
  const content = e.target.content.value;

  try {
    isEmpty(subject, writer, content);
    board.subject = subject;
    board.writer = writer;
    board.content = content;

    const boardsStr = JSON.stringify(boardsObj);
    localStorage.setItem("boards", boardsStr);
    location.href = "/board/view.html" + idx;
  } catch (e) {
    alert(e.message);
    console.error(e);
  }
};

modifyFrm.addEventListener("submit", modifyHandler);

수정된 값이 반영이 되어 view 페이지에 반영이 된 모습

뒤로가기뒤로 가기 버튼을 구현하기 전에 뒤로 가기 부분부터 선택해보자!

const modifyFrm = document.querySelector("#modifyFrm");
const modifyFrmList = document.querySelectorAll("#modifyFrm > div");
const idx = location.search;
const index = location.search.split("=")[1];
const boardsObj = JSON.parse(localStorage.getItem("boards"));
const board = boardsObj[index];

for (let i = 0; i < modifyFrmList.length; i++) {
  const element = modifyFrmList[i].childNodes[1];
  const id = element.name;
  element.value = board[id];
}

const isEmpty = (subject, writer, content) => {
  if (subject.length === 0) throw new Error("제목을 입력해주세요");
  if (writer.length === 0) throw new Error("작성자를 입력해주세요");
  if (content.length === 0) throw new Error("내용을 입력해주세요");
};

const modifyHandler = (e) => {
  e.preventDefault();
  const subject = e.target.subject.value;
  const writer = e.target.writer.value;
  const content = e.target.content.value;

  try {
    isEmpty(subject, writer, content);
    board.subject = subject;
    board.writer = writer;
    board.content = content;

    const boardsStr = JSON.stringify(boardsObj);
    localStorage.setItem("boards", boardsStr);
    location.href = "/board/view.html" + idx;
  } catch (e) {
    alert(e.message);
    console.error(e);
  }
};

const backBtn = document.querySelector("#back");
console.log(backBtn);

modifyFrm.addEventListener("submit", modifyHandler);

뒤로가기 버튼을 선택한 결과

선택한 뒤로가기 버튼에 이벤트를 걸어서 이전 페이지로 이동할 수 있도록 해보자!

const modifyFrm = document.querySelector("#modifyFrm");
const modifyFrmList = document.querySelectorAll("#modifyFrm > div");
const idx = location.search;
const index = location.search.split("=")[1];
const boardsObj = JSON.parse(localStorage.getItem("boards"));
const board = boardsObj[index];

for (let i = 0; i < modifyFrmList.length; i++) {
  const element = modifyFrmList[i].childNodes[1];
  const id = element.name;
  element.value = board[id];
}

const isEmpty = (subject, writer, content) => {
  if (subject.length === 0) throw new Error("제목을 입력해주세요");
  if (writer.length === 0) throw new Error("작성자를 입력해주세요");
  if (content.length === 0) throw new Error("내용을 입력해주세요");
};

const modifyHandler = (e) => {
  e.preventDefault();
  const subject = e.target.subject.value;
  const writer = e.target.writer.value;
  const content = e.target.content.value;

  try {
    isEmpty(subject, writer, content);
    board.subject = subject;
    board.writer = writer;
    board.content = content;

    const boardsStr = JSON.stringify(boardsObj);
    localStorage.setItem("boards", boardsStr);
    location.href = "/board/view.html" + idx;
  } catch (e) {
    alert(e.message);
    console.error(e);
  }
};

const backBtn = document.querySelector("#back");

const backBtnHandler = (e) => {
  location.href = document.referrer;
};

modifyFrm.addEventListener("submit", modifyHandler);
backBtn.addEventListener("click", backBtnHandler);

뒤로가기 버튼이 잘 작동하는 모습

오늘은 이전에 만들었던 게시판에 list 페이지와 view 페이지를 만들어 보자!

파일 목록

📦Board
┣ 📂board
┃┣ 📜list.html
┃ ┣ 📜modify.html
┃ ┣ 📜view.html
┃ ┗ 📜write.html
┣ 📂public
┃ ┗ 📂js
┃ ┃ ┣ 📜list.js
┃ ┃ ┣ 📜modify.js
┃ ┃ ┣ 📜view.js
┃ ┃ ┗ 📜write.js
┗ 📜index.html

구현

구현해야 할 사항은 크게 다음과 같다.

  • 게시물 작성하기 (Create)
  • 리스트로 게시물 보여주기 (Read)
  • 게시물 클릭 시 해당 게시물 보여주기 (Read)
  • 게시물 수정하기 (Update)
  • 게시물 삭제하기 (Delete)

게시판 구현하기

게시판 구조

게시판 구조

리스트로 게시물 보여주기 (Read)

# public/js/list.js

현재 리스트 파일의 코드는 다음과 같다.

let boardsStr = localStorage.getItem("boards");

if (boardsStr === null) {
  const listStr = JSON.stringify([]);
  localStorage.setItem("boards", listStr);
  boardsStr = listStr;
}

localStrorage에서 boards라는 키를 가진 데이터를 불러오는데 없으면 빈 배열을 boards에 담아 저장하고 있다.

list 페이지는 write 페이지에서 저장한 데이터를 보여주는 페이지이다.

write 페이지에 데이터를 생성한 다음 list.js 파일에서 데이터를 불러오는 작업을 한번 진행해보자!

write 페이지에서 데이터 생성하기

데이터를 생성해 주었다면 list.js 파일에서 localStorage에 저장된 데이터를 가져와보자!

# public/js/list.js

let boardsStr = localStorage.getItem("boards");

if (boardsStr === null) {
  const listStr = JSON.stringify([]);
  localStorage.setItem("boards", listStr);
  boardsStr = listStr;
}

const boardsObj = JSON.parse(boardsStr);

console.log(boardsObj);

list.js 파일에서 localStorage의 데이터를 불러온 모습

가져온 데이터를 아래 형태에 맞게 tbody에 넣어 주어야 한다.

<tr>
  <td>번호</td>
  <td>글제목</td>
  <td>작성자</td>
  <td>등록일</td>
  <td>조회수</td>
</tr>

위 형식에 맞는 템플릿을 만드는 함수를 생성해 보자!

let boardsStr = localStorage.getItem("boards");

if (boardsStr === null) {
  const listStr = JSON.stringify([]);
  localStorage.setItem("boards", listStr);
  boardsStr = listStr;
}

const boardsObj = JSON.parse(boardsStr);

const template = () => {
  return `
  <tr>
    <td>번호</td>
    <td>글제목</td>
    <td>작성자</td>
    <td>등록일</td>
    <td>조회수</td>
  </tr>
  `;
};

console.log(template());

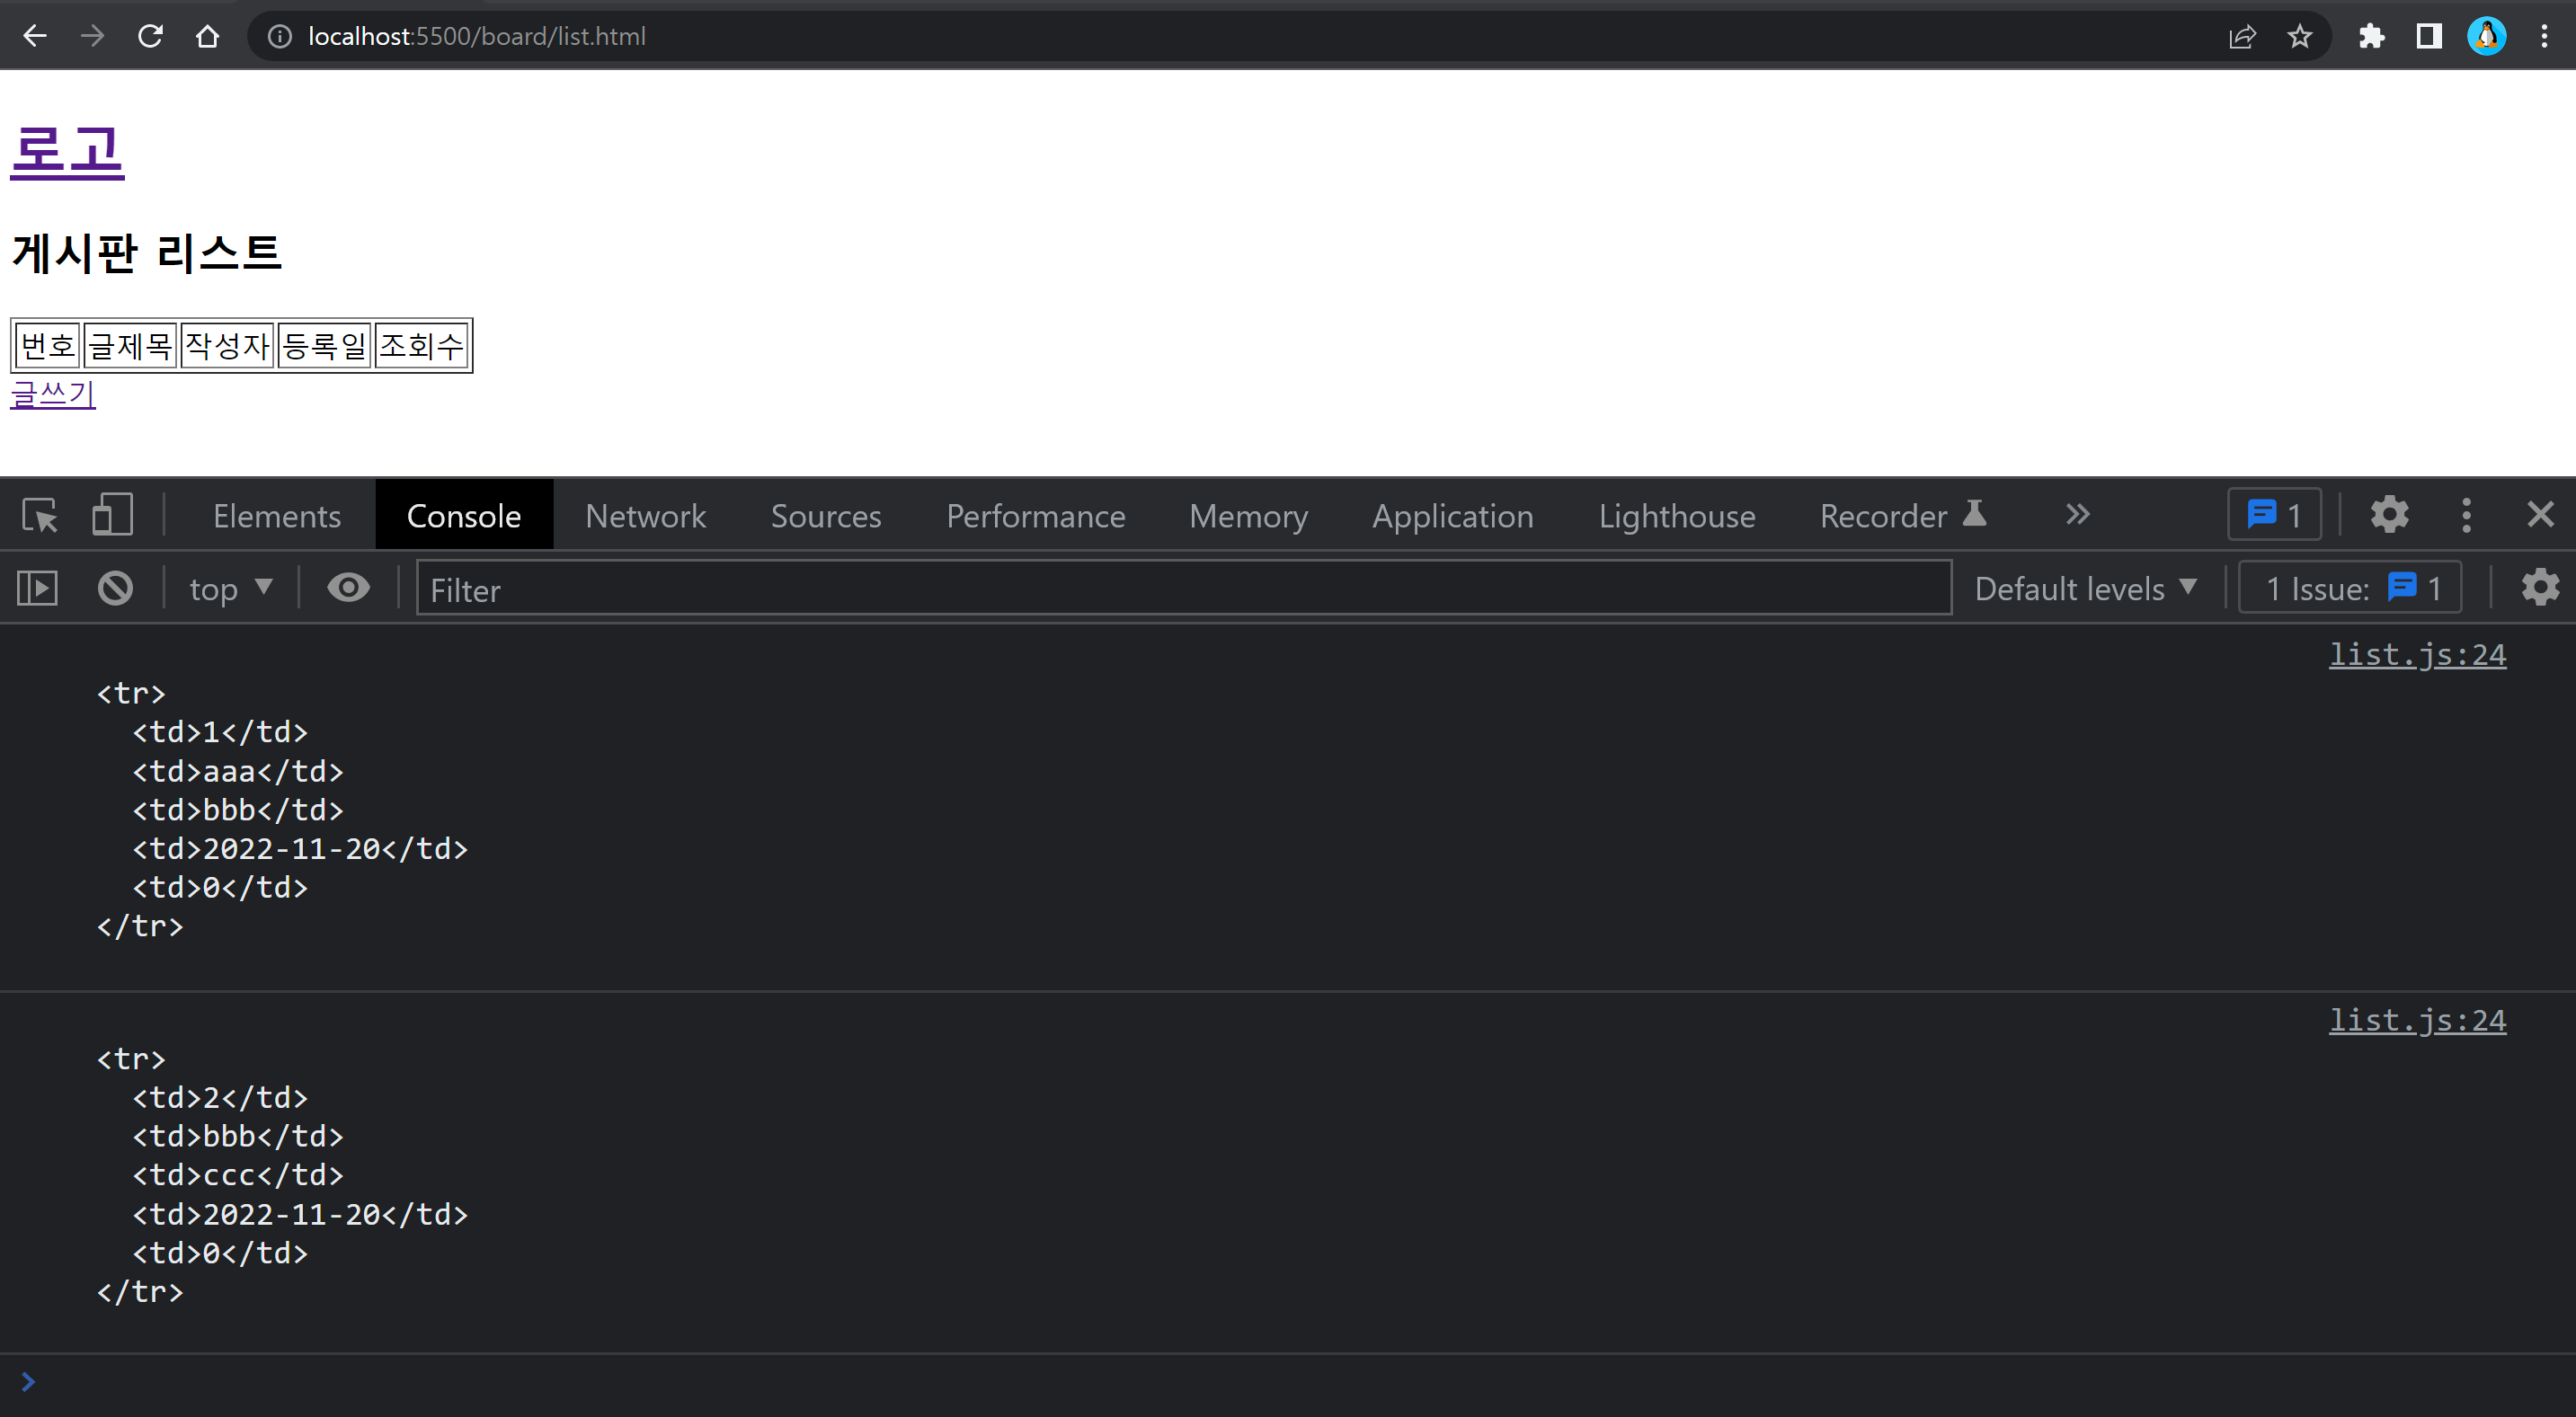
template함수 실행 결과

template 함수에 두 개의 매개변수를 생성해서 boards의 데이터에 있는 값들이 들어갈 수 있도록 해보자!

let boardsStr = localStorage.getItem("boards");

if (boardsStr === null) {
  const listStr = JSON.stringify([]);
  localStorage.setItem("boards", listStr);
  boardsStr = listStr;
}

const boardsObj = JSON.parse(boardsStr);

const template = (index, objValue) => {
  return `
  <tr>
    <td>${index + 1}</td>
    <td>${objValue.subject}</td>
    <td>${objValue.writer}</td>
    <td>${objValue.date}</td>
    <td>${objValue.views}</td>
  </tr>
  `;
};

for (let i = 0; i < boardsObj.length; i++) {
  console.log(template(i, boardsObj[i]));
}

template 함수에서 index와 objValue를 받을 수 있도록 했다.

index는 list 페이지에서 보여줄 데이터의 순서로 실제 boards 안의 index를 의미하지는 않는다.

objValue는 i 값에 해당하는 index에 위치한 boards안에 있는 데이터를 의미한다.

매개변수를 추가한 templage 함수 실행 결과

이제 tbody 요소를 선택한 다음 이 값을 innerHTML을 이용하여 tbody 안에 넣어주면 된다.

let boardsStr = localStorage.getItem("boards");

if (boardsStr === null) {
  const listStr = JSON.stringify([]);
  localStorage.setItem("boards", listStr);
  boardsStr = listStr;
}

const boardsObj = JSON.parse(boardsStr);

const template = (index, objValue) => {
  return `
  <tr>
    <td>${index + 1}</td>
    <td>${objValue.subject}</td>
    <td>${objValue.writer}</td>
    <td>${objValue.date}</td>
    <td>${objValue.views}</td>
  </tr>
  `;
};

const tbody = document.querySelector("tbody");

for (let i = 0; i < boardsObj.length; i++) {
  tbody.innerHTML += template(i, boardsObj[i]);
}

list 페이지에 데이터가 잘 출력되는 모습

list 페이지에 원하는 결과가 잘 출력되고 있다.

이번에는 글제목을 클릭하면 해당하는 게시물로 이동할 수 있도록 해보자!

그리고 url에 이게 몇 번째 게시물인지 알 수 있도록 매개변수로 데이터의 인덱스를 넘겨주자!

url에 매개변수를 넘겨주는 이유는 view 페이지에서는 몇 번째 게시물을 클릭해서 들어왔는지 알 수 없기 때문에 url에 매개변수를 넘겨주는 것이다. 

let boardsStr = localStorage.getItem("boards");

if (boardsStr === null) {
  const listStr = JSON.stringify([]);
  localStorage.setItem("boards", listStr);
  boardsStr = listStr;
}

const boardsObj = JSON.parse(boardsStr);

const template = (index, objValue) => {
  return `
  <tr>
  <td>${index + 1}</td>
  <td><a href="/board/view.html?index=${objValue.index}">${objValue.subject}</a></td>
  <td>${objValue.writer}</td>
  <td>${objValue.date}</td>
  <td>${objValue.views}</td>
  </tr>
  `;
};

const tbody = document.querySelector("tbody");

for (let i = 0; i < boardsObj.length; i++) {
  tbody.innerHTML += template(i, boardsObj[i]);
}

a 태그의 href 속성을 이용해 페이지를 이동할 수 있도록 하였다. 그리고 해당하는 데이터의 index값도 같이 넘겨주었다.

해당 게시물을 선택하면 url이 바뀌는 모습

쿼리 스트링 (Query String)
쿼리 스트링은 url 부분에 ? 뒤에 붙은 매개변수들로 구성된다.
? 뒤에 붙은 매개변수들은 key=value 형태로 이루어진다. 
자바스크립트에서 전달한 파라미터를 이용하기 위해 window.location 객체를 이용한다.

위에 그림을 보면 해당 게시물을 클릭했을 때 url 부분이 바뀌는 걸 볼 수 있다. 

형태를 살펴보면 다음과 같다.

쿼리 스트링 형태

이제 view 페이지에서 넘겨받은 인덱스 값을 이용해 해당하는 데이터를 보여주는 작업을 해보자!

게시물 클릭 시 해당 게시물 보여주기 (Read)

# public/js/view.js

데이터를 가져오는 작업부터 하자!

const boardsStr = localStorage.getItem("boards");
const boardsObj = JSON.parse(boardsStr);

console.log(boardsStr);
console.log(boardsObj);

localStorage에서 데이터를 가져와서 원본 형태로 변환한 모습

데이터를 잘 가져왔다면 이번에는 url의 쿼리 스트링을 가져와서 필요한 형태로 만들어보자!

쿼리스트링을 가져오려면 location 객체의 search 속성을 이용하면 된다.

const boardsStr = localStorage.getItem("boards");
const boardsObj = JSON.parse(boardsStr);

const idx = location.search;
console.dir(location);
console.log(idx);

쿼리스트링 가져오기

우리가 필요한 건 index=0에서 0 부분이다.

0 부분을 split 메서드를 사용해 잘라내자!

const boardsStr = localStorage.getItem("boards");
const boardsObj = JSON.parse(boardsStr);

const idx = location.search;
const index = idx.split("=")[1];

console.log(idx);
console.log(idx.split("="));
console.log(index);

필요한 부분을 잘라낸 결과

잘라낸 인덱스를 이용해 원하는 데이터를 출력해보자!

const boardsStr = localStorage.getItem("boards");
const boardsObj = JSON.parse(boardsStr);

const idx = location.search;
const index = idx.split("=")[1];
const board = boardsObj[index];

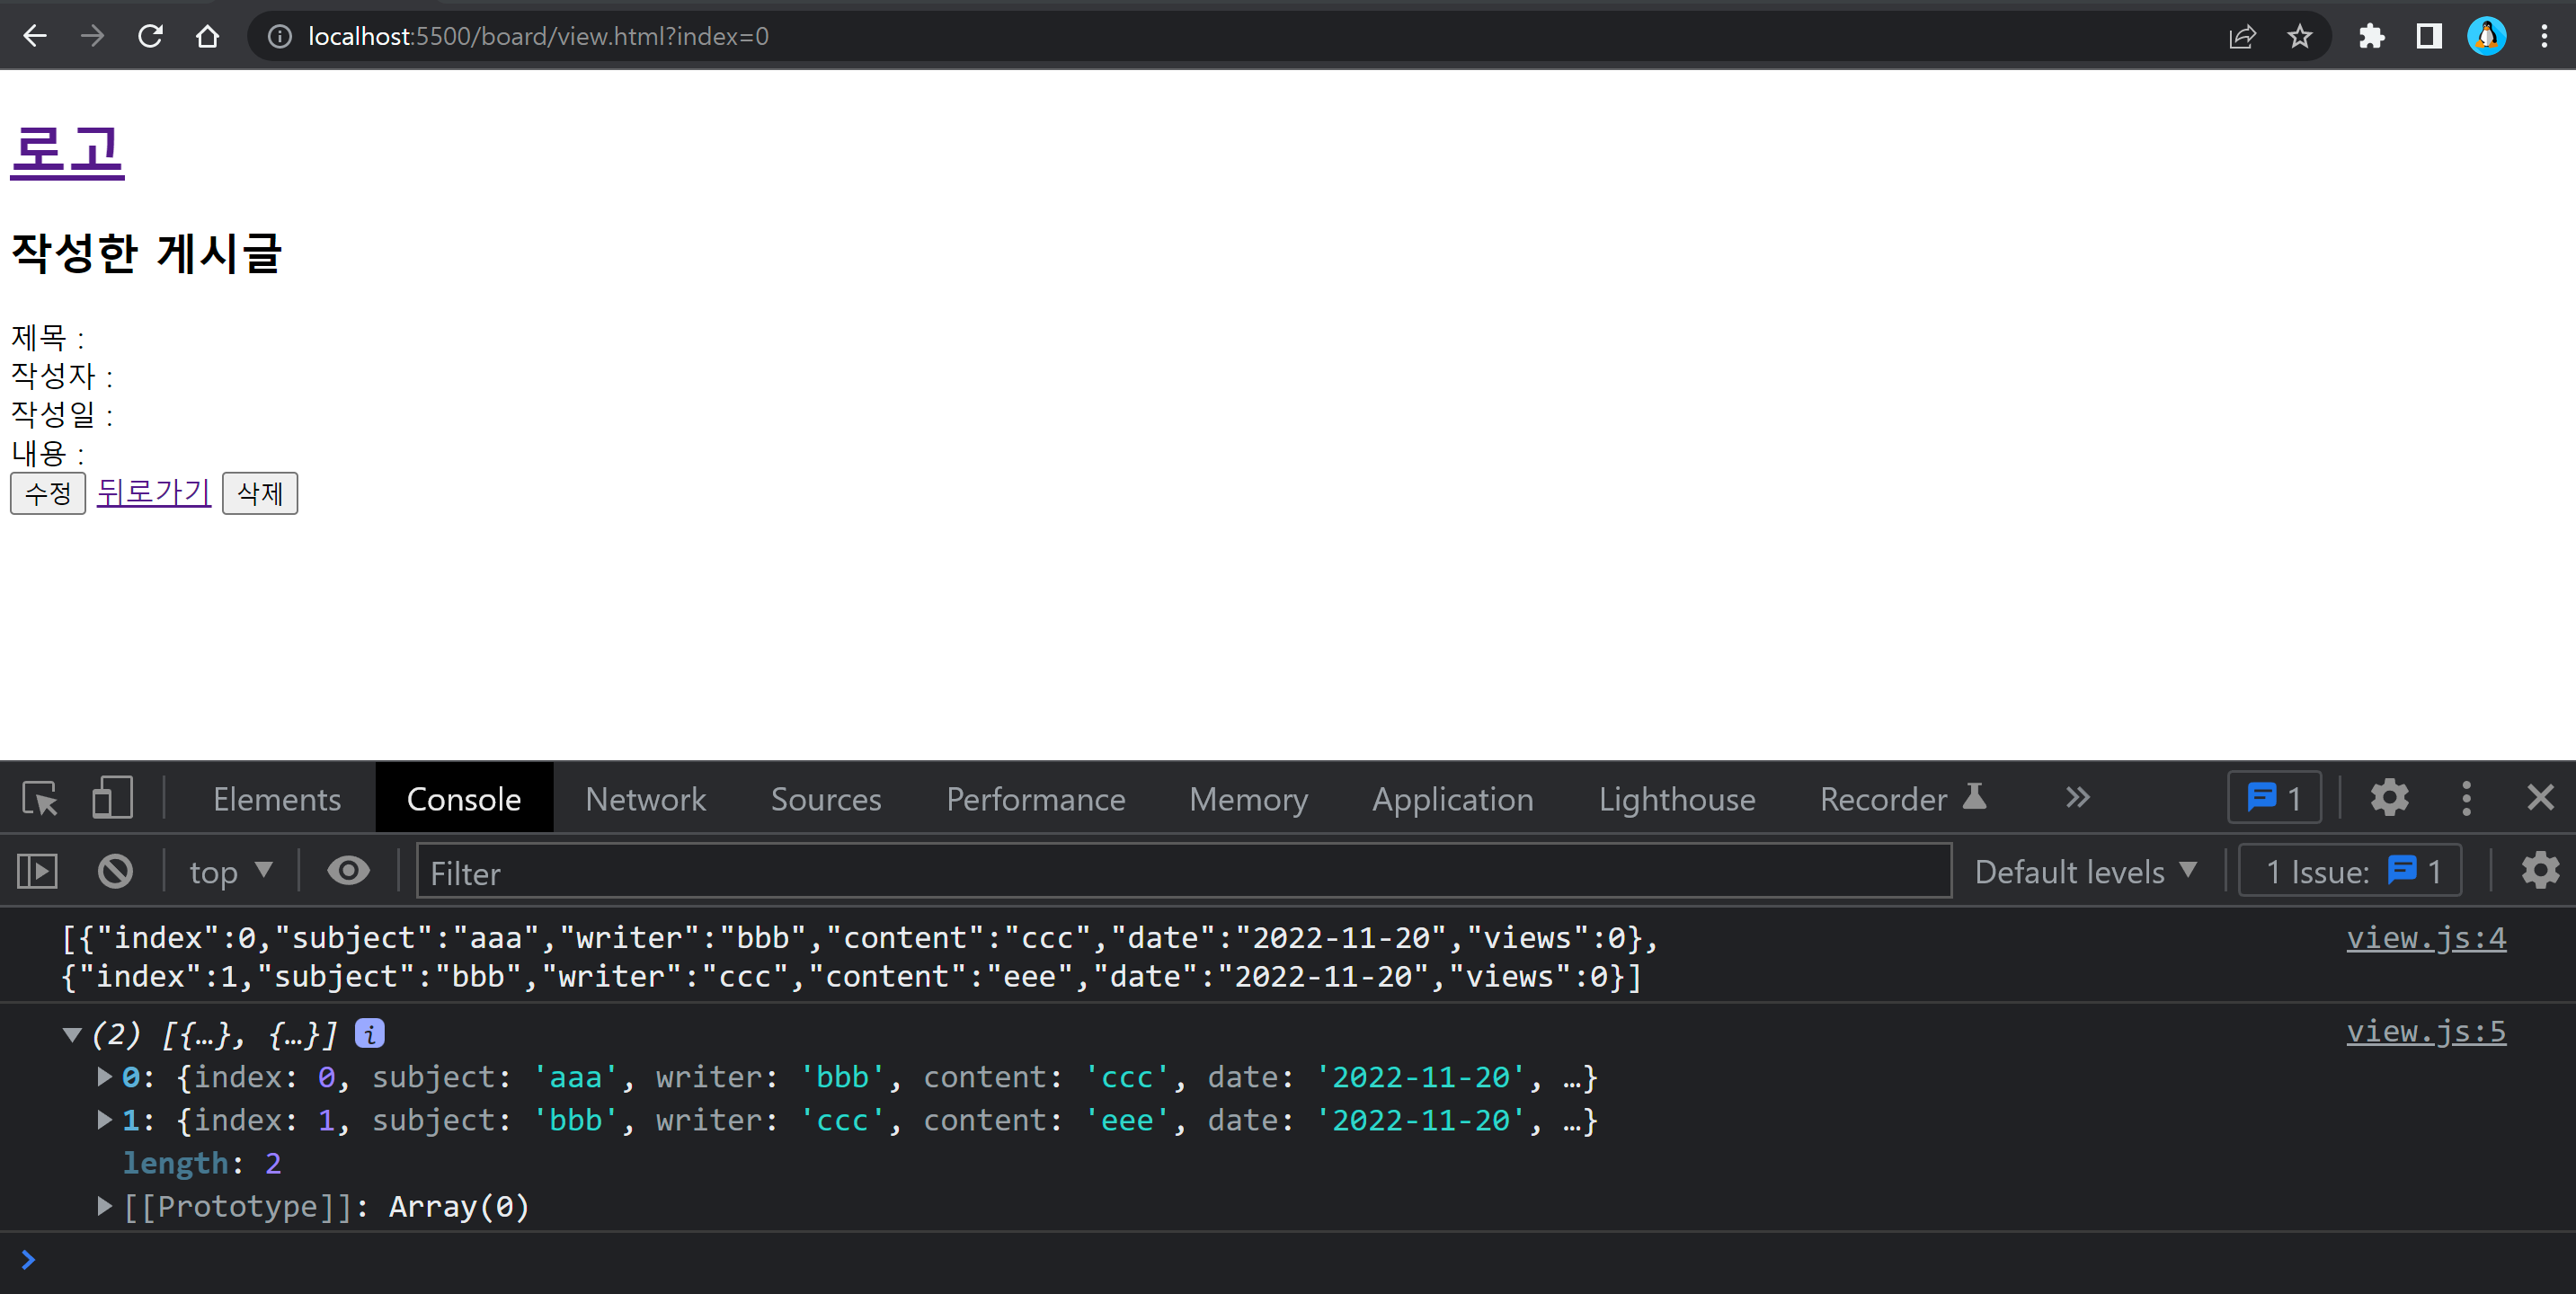
console.log(board);

boards 데이터를 출력한 결과

이제 이 데이터를 위치에 맞게 뿌려주면 된다. 

뿌려줄 위치를 선택해보자!

const boardsStr = localStorage.getItem("boards");
const boardsObj = JSON.parse(boardsStr);

const idx = location.search;
const index = idx.split("=")[1];
const board = boardsObj[index];

const viewFrm = document.querySelectorAll("#viewFrm > div");
console.log(viewFrm);

데이터를 출력할 위치를 선택한 모습

const boardsStr = localStorage.getItem("boards");
const boardsObj = JSON.parse(boardsStr);

const idx = location.search;
const index = idx.split("=")[1];
const board = boardsObj[index];

const viewFrm = document.querySelectorAll("#viewFrm > div");

for (let i = 0; i < viewFrm.length; i++) {
  const id = viewFrm[i].id;
  viewFrm[i].innerHTML += " " + board[id];
}

데이터가 잘 출력되는 모습

for 문을 사용해 div 태그의 i번째 id 값을 가져온다.

boards 데이터에 id와 같은 이름을 가진 속성을 선택해 해당하는 값을 i번째 div에 넣어주었다.

[+추가] 조회수 구현

게시물을 클릭하면 조회수가 올라가도록 해보자!

주의해야 할 점은 현재 글을 작성하면 작성한 글을 바로 보여주게 되어있기 때문에 글 작성 직후에는 조회수가 올라가지 않도록 해줘야 한다.

그래서 나는 document.referrer를 사용했다.

document.referrer에는 이전 페이지의 url이 담겨 있기 때문이다. 

직접 한번 확인해 보자!

const boardsStr = localStorage.getItem("boards");
const boardsObj = JSON.parse(boardsStr);

const idx = location.search;
const index = idx.split("=")[1];
const board = boardsObj[index];

const viewFrm = document.querySelectorAll("#viewFrm > div");

for (let i = 0; i < viewFrm.length; i++) {
  const id = viewFrm[i].id;
  viewFrm[i].innerHTML += " " + board[id];
}

console.log(document.referrer);

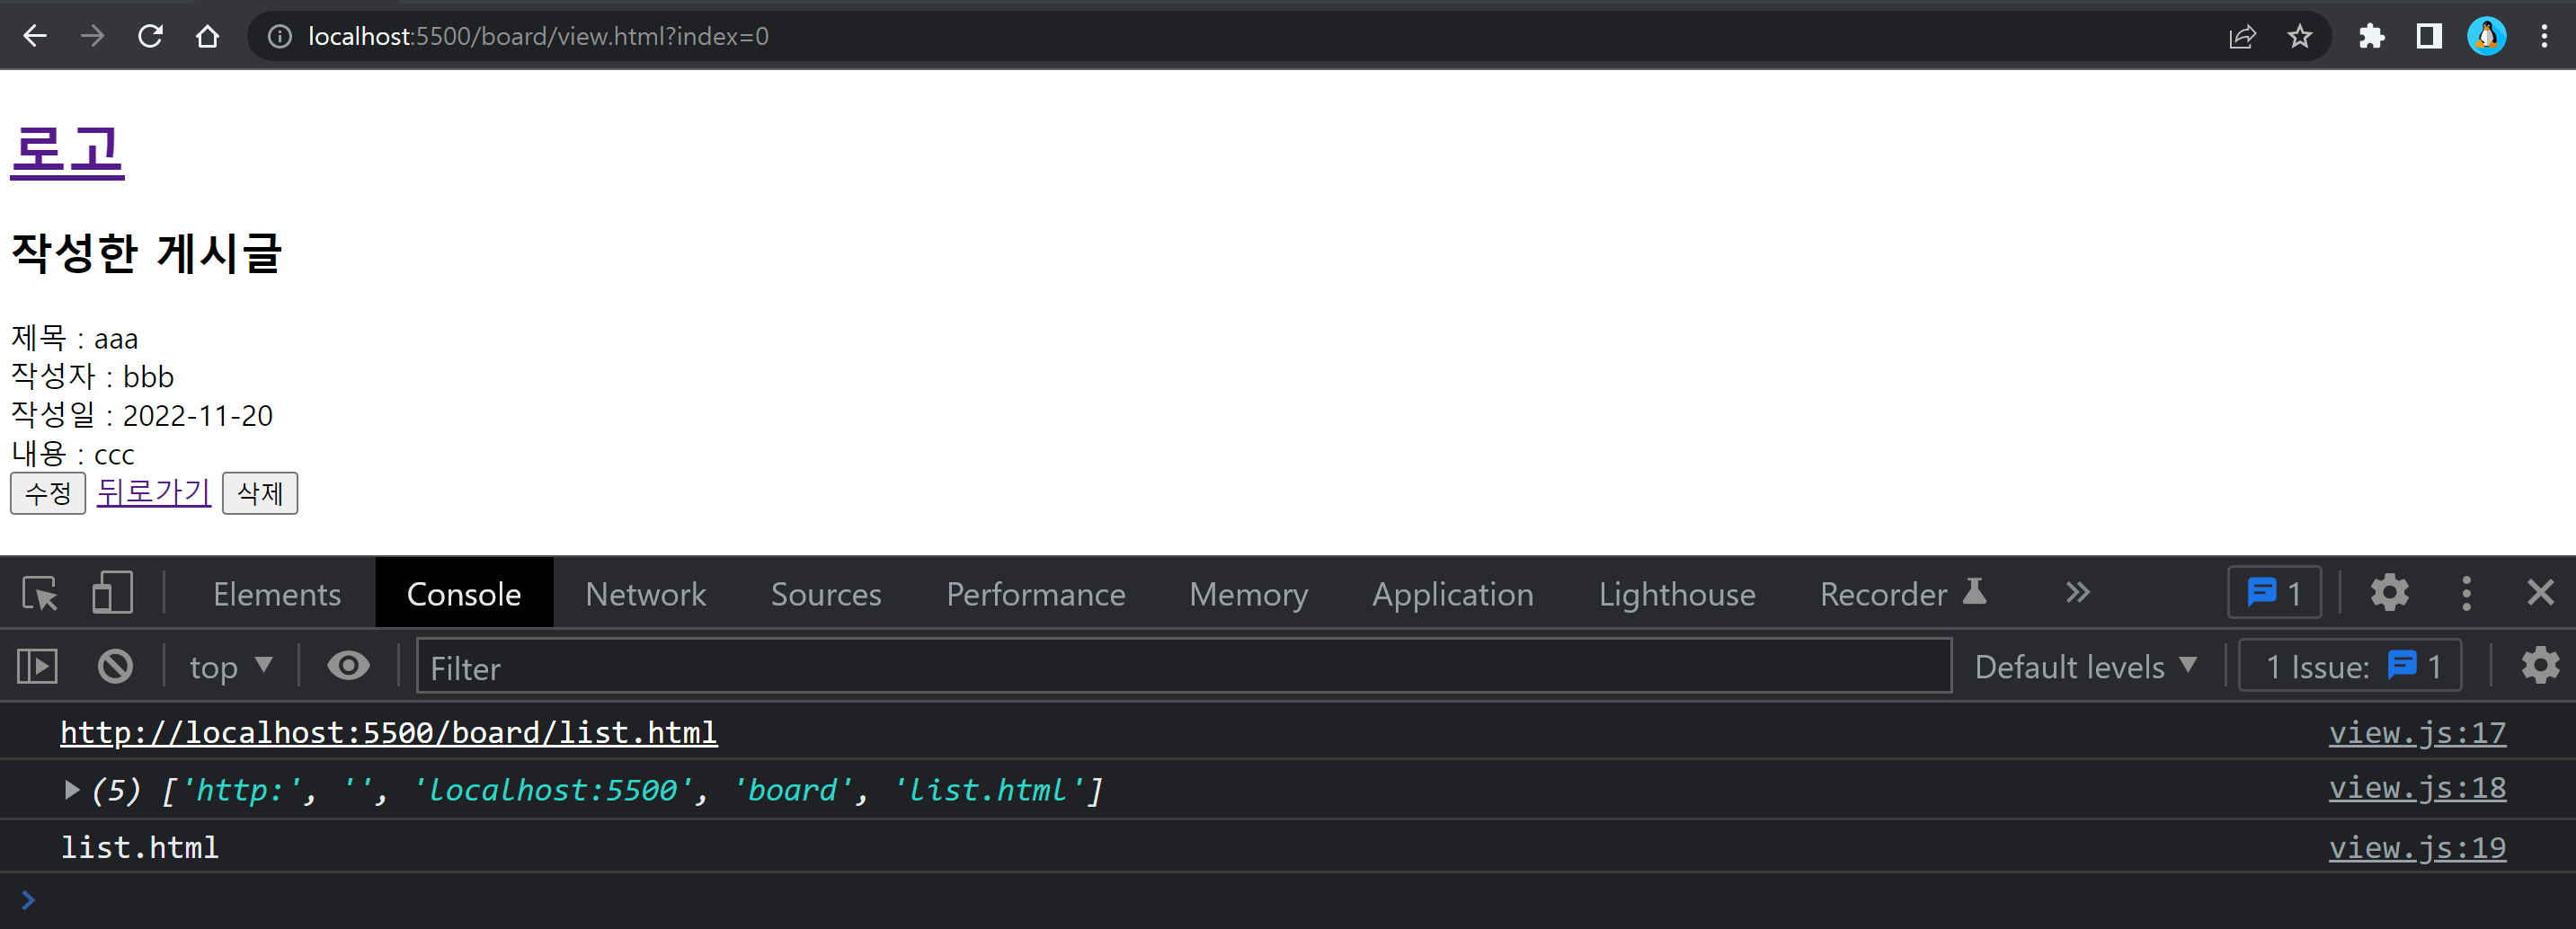
이전 페이지인 list.html이 출력되는 모습

이전 페이지의 url을 원하는 형태로 잘라보자!

const boardsStr = localStorage.getItem("boards");
const boardsObj = JSON.parse(boardsStr);

const idx = location.search;
const index = idx.split("=")[1];
const board = boardsObj[index];

const viewFrm = document.querySelectorAll("#viewFrm > div");

for (let i = 0; i < viewFrm.length; i++) {
  const id = viewFrm[i].id;
  viewFrm[i].innerHTML += " " + board[id];
}

const beforeUrl = document.referrer;

console.log(beforeUrl);
console.log(beforeUrl.split("/"));
console.log(beforeUrl.split("/").pop());

이전 url을 원하는 형태로 자른 모습

이제 이전 페이지가 list.html 일 때만 조회수가 올라갈 수 있도록 코드를 구현해 보자!

const boardsStr = localStorage.getItem("boards");
const boardsObj = JSON.parse(boardsStr);

const idx = location.search;
const index = idx.split("=")[1];
const board = boardsObj[index];

const beforeUrl = document.referrer;

const viewCount = (beforeUrl) => {
  if (beforeUrl.split("/").pop() === "list.html") {
    board.views++;
    const viewCountStr = JSON.stringify(boardsObj);
    localStorage.setItem("boards", viewCountStr);
  }
};

viewCount(beforeUrl);

const viewFrm = document.querySelectorAll("#viewFrm > div");

for (let i = 0; i < viewFrm.length; i++) {
  const id = viewFrm[i].id;
  viewFrm[i].innerHTML += " " + board[id];
}

조회수가 잘 작동하는 모습

Javascript 코드

# public/js/list.js

let boardsStr = localStorage.getItem("boards");

if (boardsStr === null) {
  const listStr = JSON.stringify([]);
  localStorage.setItem("boards", listStr);
  boardsStr = listStr;
}

const boardsObj = JSON.parse(boardsStr);

const template = (index, objValue) => {
  return `
  <tr>
  <td>${index + 1}</td>
  <td><a href="/board/view.html?index=${objValue.index}">${objValue.subject}</a></td>
  <td>${objValue.writer}</td>
  <td>${objValue.date}</td>
  <td>${objValue.views}</td>
  </tr>
  `;
};

const tbody = document.querySelector("tbody");

for (let i = 0; i < boardsObj.length; i++) {
  tbody.innerHTML += template(i, boardsObj[i]);
}

# public/js/view.js

const boardsStr = localStorage.getItem("boards");
const boardsObj = JSON.parse(boardsStr);

const idx = location.search;
const index = idx.split("=")[1];
const board = boardsObj[index];

const beforeUrl = document.referrer;

const viewCount = (beforeUrl) => {
  if (beforeUrl.split("/").pop() === "list.html") {
    board.views++;
    const viewCountStr = JSON.stringify(boardsObj);
    localStorage.setItem("boards", viewCountStr);
  }
};

viewCount(beforeUrl);

const viewFrm = document.querySelectorAll("#viewFrm > div");

for (let i = 0; i < viewFrm.length; i++) {
  const id = viewFrm[i].id;
  viewFrm[i].innerHTML += " " + board[id];
}

오늘은 게시판 만들어 보자!

이번에는 HTML과 Javascript 파일을 용도에 맞게 분리해서 작성할 예정이다.

이렇게 되면 다른 Javascript 파일에서 사용하는 변수와 데이터들은 이름이 다른 Javascript 파일에서 사용할 수 없다.

그래서 브라우저의 localStorage를 이용할 예정이다.

파일 목록

📦Board
┣ 📂board
┃┣ 📜list.html
┃ ┣ 📜modify.html
┃ ┣ 📜view.html
┃ ┗ 📜write.html
┣ 📂public
┃ ┗ 📂js
┃ ┃ ┣ 📜list.js
┃ ┃ ┣ 📜modify.js
┃ ┃ ┣ 📜view.js
┃ ┃ ┗ 📜write.js
┗ 📜index.html

구현

구현해야 할 사항은 크게 다음과 같다.

  • 게시물 작성하기 (Create)
  • 리스트로 게시물 보여주기 (Read)
  • 게시물 클릭시 해당 게시물 보여주기 (Read)
  • 게시물 수정하기 (Update)
  • 게시물 삭제하기 (Delete)

여기서 HTML 파일에대한 설명은 하지 않고 자바스크립트 코드에 대해서만 설명을 할 예정이다.

HTML 파일은 아래 코드를 복사해서 생성한다.

HTML

# index.html

<!DOCTYPE html>
<html lang="en">
  <head>
    <meta charset="UTF-8" />
    <meta http-equiv="X-UA-Compatible" content="IE=edge" />
    <meta name="viewport" content="width=device-width, initial-scale=1.0" />
    <title>Document</title>
  </head>
  <body>
    <h1>
      <a href="/index.html">로고</a>
    </h1>
    <a href="./board/list.html">게시판으로 가기</a>
  </body>
</html>

index.html

# board/write.html

<!DOCTYPE html>
<html lang="en">
  <head>
    <meta charset="UTF-8" />
    <meta http-equiv="X-UA-Compatible" content="IE=edge" />
    <meta name="viewport" content="width=device-width, initial-scale=1.0" />
    <title>Document</title>
  </head>
  <body>
    <h1>
      <a href="/index.html">로고</a>
    </h1>
    <h2>게시판 쓰기</h2>

    <form id="writeFrm">
      <div>제목 : <input type="text" name="subject" /></div>
      <div>작성자 : <input type="text" name="writer" /></div>
      <div>내용 : <textarea name="content"></textarea></div>
      <input type="submit" value="글작성" />
    </form>
    <a href="./list.html">뒤로가기</a>
    <script src="../public/js/write.js"></script>
  </body>
</html>

board/write.html

# board/list.html

<!DOCTYPE html>
<html lang="en">
  <head>
    <meta charset="UTF-8" />
    <meta http-equiv="X-UA-Compatible" content="IE=edge" />
    <meta name="viewport" content="width=device-width, initial-scale=1.0" />
    <title>Document</title>
  </head>
  <body>
    <h1>
      <a href="/index.html">로고</a>
    </h1>
    <h2>게시판 리스트</h2>
    <table border="1">
      <thead>
        <tr>
          <td>번호</td>
          <td>글제목</td>
          <td>작성자</td>
          <td>등록일</td>
          <td>조회수</td>
        </tr>
      </thead>
      <tbody></tbody>
    </table>
    <a href="./write.html">글쓰기</a>
    <script src="../public/js/list.js"></script>
  </body>
</html>

board/list.html

# board/view.html

<!DOCTYPE html>
<html lang="en">
  <head>
    <meta charset="UTF-8" />
    <meta http-equiv="X-UA-Compatible" content="IE=edge" />
    <meta name="viewport" content="width=device-width, initial-scale=1.0" />
    <title>Document</title>
  </head>
  <body>
    <h1>
      <a href="/index.html">로고</a>
    </h1>
    <h2>작성한 게시글</h2>

    <form id="viewFrm">
      <div id="subject">제목 :</div>
      <div id="writer">작성자 :</div>
      <div id="date">작성일 :</div>
      <div id="content">내용 :</div>
    </form>
    <button id="modify">수정</button>
    <a href="./list.html">뒤로가기</a>
    <button id="delete">삭제</button>
    <script src="../public/js/view.js"></script>
  </body>
</html>

board/view.html

# board/modify.html

<!DOCTYPE html>
<html lang="en">
  <head>
    <meta charset="UTF-8" />
    <meta http-equiv="X-UA-Compatible" content="IE=edge" />
    <meta name="viewport" content="width=device-width, initial-scale=1.0" />
    <title>Document</title>
  </head>
  <body>
    <h1>
      <a href="/index.html">로고</a>
    </h1>
    <h2>글 수정</h2>

    <form id="modifyFrm">
      <div>제목 : <input type="text" name="subject" /></div>
      <div>작성자 : <input type="text" name="writer" /></div>
      <div>내용 : <textarea name="content"></textarea></div>
      <input type="submit" value="수정완료" />
    </form>
    <button id="back" style="margin-top: 10px">뒤로가기</button>
    <script src="../public/js/modify.js"></script>
  </body>
</html>

board/modify.html

Javascript

게시판의 구조는 다음과 같이 만들 예정이다.

게시판 구조

게시물 작성하기 (Create)

# public/js/write.js

제일 먼저 CRUD중 C에 해당하는 게시물을 작성하는 자바스크립트 파일을 만든다.

이벤트를 걸 writeFrm 요소를 선택해 준다.

const writeFrm = document.querySelector("#writeFrm");
console.log(writeFrm);

writeFrm 요소를 선택한 결과

글작성 버튼에 addEventListener로 submit 이벤트를 걸어준다.

submit의 기본동작을 막아준 뒤 이벤트가 잘 걸렸는지 console.log로 이벤트 객체를 출력해본다.

const writeFrm = document.querySelector("#writeFrm");

const submitHandler = (e) => {
  e.preventDefault();
  console.log(e);
};

writeFrm.addEventListener("submit", submitHandler);

submit 이벤트 작동 확인

이벤트가 잘 걸렸다면 input 박스들과 textarea의 값들을 받아와야 한다.

아래와 같이 코드를 작성한 다음 input 박스들과 textarea에 값을 채우고 글작성을 눌러서 값을 잘 받았는지 확인한다.

const writeFrm = document.querySelector("#writeFrm");

const submitHandler = (e) => {
  e.preventDefault();
  const subject = e.target.subject.value;
  const writer = e.target.writer.value;
  const content = e.target.content.value;

  console.log(subject);
  console.log(writer);
  console.log(content);
};

writeFrm.addEventListener("submit", submitHandler);

입력한 값을 잘 받아오는지 확인

값을 잘 받아온다면 값을 담을 공간이 필요하다.

class를 이용해서 객체를 생성할 틀을 만들어 준다.

class Board {
  constructor(indexNum, subjectStr, writerStr, contentStr) {
    this.index = indexNum;
    this.Subject = subjectStr;
    this.Writer = writerStr;
    this.Content = contentStr;
    this.date = recordDate();
    this.views = 0;
  }

  set Subject(value) {
    if (value.length === 0) throw new Error("제목을 입력해주세요.");
    this.subject = value;
  }

  set Writer(value) {
    if (value.length === 0) throw new Error("작성자를 입력해주세요.");
    this.writer = value;
  }

  set Content(value) {
    if (value.length === 0) throw new Error("내용을 입력해주세요.");
    this.content = value;
  }
}

객체를 생성할 때 4개의 매개변수를 받아 온다.

index 속성에는 매개변수 indexNum 값이 할당된다.

Subject 속성은 setter로 매개 변수 subjectStr을 받게 되면 길이가 0이 아닌지 검사한다음 subject 속성에 subjectStr 값이 할당된다. 값의 내용은 사용자가 작성한 제목이다. 만약 길이가 0이라면 예외를 발생시킨다.

Writer 속성은 setter로 매개 변수 writerStr을 받게 되면 길이가 0이 아닌지 검사한다음 writer 속성에 writerStr 값이 할당된다. 값의 내용은 사용자가 작성한 작성자다. 만약 길이가 0이라면 예외를 발생시킨다.

Content 속성은 setter로 매개 변수 contentStr을 받게 되면 길이가 0이 아닌지 검사한다음 content 속성에 contentStr 값이 할당된다. 값의 내용은 사용자가 작성한 내용이다. 만약 길이가 0이라면 예외를 발생시킨다.

date 속성에는 아래에 작성할 recordDate 함수의 호출 결과가 할당된다. 값의 내용은 현재 날짜다.

views 속성은 조회수를 위한 속성으로 기본값이 0이 할당된다.

const recordDate = () => {
  const date = new Date();
  const yyyy = date.getFullYear();
  let mm = date.getMonth() + 1;
  let dd = date.getDate();

  mm = (mm > 9 ? "" : 0) + mm;
  dd = (dd > 9 ? "" : 0) + dd;

  const arr = [yyyy, mm, dd];

  return arr.join("-");
};

recordDate 함수는 현재 날짜를 yyyy-mm-dd 형식으로 반환해주는 함수이다.

객체가 잘 생성되는지 확인해본다.

객체 생성 확인

여기서 잠깐 list.js 파일을 작성해야 한다.

우리는 localStorage를 이용해 데이터를 저장할 예정이다.

데이터를 저장할때 우리가 생성한 객체를 배열에 담을 예정이다. 그래야 관리하기 편하기 때문이다.

배열을 생성하는 시점은 list.js 파일이 로드되는 시점이어야 하는데 일반적인 게시판은 처음 들어갔을 때 보이는 화면이 게시글을 목록이다. 

이 말은 localStorage의 데이터를 처음 가져오는 시점이 list.js 파일이 로드되는 시점이라는 말이다.

localStorage는 비어있으면 null 값을 반환하는데 이를 이용해 비어있으면 빈 배열을 넣어줄 예정이다.


# board/list.js

getItem이라는 메서드로 localStorage에 저장된 데이터를 불러올 수 있다.

let boardsStr = localStorage.getItem("boards");

console.log(boardsStr);

Local Storage가 비어있으면 null 값을 반환
Local Storage가 비어있는 모습

localStorage가 비어있으면 빈 배열을 저장하는 코드이다.

JSON.stringify는 인자를 JSON 문자열로 변해준다.

setItem 메서드로 저장을 하려면 첫번째 인자는 key 두번째 인자는 value 값인데 이 값이 string이어야 한다.

그래서 나중에 데이터를 수정하려면 JSON 문자열을 받아와서 다시 배열로 바꿔주는 작업이 필요하다.

let boardsStr = localStorage.getItem("boards");

if (boardsStr === null) {
  const listStr = JSON.stringify([]);
  localStorage.setItem("boards", listStr);
  boardsStr = listStr;
}

Local Storage에 빈 배열이 저장된 모습

# board/write.js

다시 write.js 파일을 작성한다.

이제는 submit 이벤트가 발생하면 객체를 생성해서 localStorage에 저장해주어야 한다.

다음과 같이 코드를 작성한다.

const submitHandler = (e) => {
  e.preventDefault();
  const subject = e.target.subject.value;
  const writer = e.target.writer.value;
  const content = e.target.content.value;

  try {
    // boards 가져오기
    const boardsObj = JSON.parse(localStorage.getItem("boards"));

    // 객체 추가
    const index = boardsObj.length;
    const instance = new Board(index, subject, writer, content);
    boardsObj.push(instance);

    // boards 저장
    const boardsStr = JSON.stringify(boardsObj);
    localStorage.setItem("boards", boardsStr);
    location.href = "/board/view.html?index=" + index;
  } catch (e) {
    // 예외 발생시 메시지 출력
    alert(e.message);
    console.error(e);
  }
};

writeFrm.addEventListener("submit", submitHandler);

localStorage에 있는 boards 데이터를 가져와서 객체 형태로 변환한다.

index는 boards 데이터의 배열 길이만큼이다.

새로운 객체를 생성하는데 인자로 boards 데이터의 배열 길이와 input 박스와 textarea에 작성한 값들을 넘겨줘서 초기값을 설정해 준다.

생성한 객체를 boards 배열에 추가해준다.

배열을 다시 JSON 문자열로 변환한다음 localStorage에 저장한다.

view.html로 이동하면서 index 값을 전달해 준다.

만약 예외가 발생하면 예외 메시지를 경고창으로 띄워주고 콘솔 창에도 출력해 준다.

글을 작성한 값이 LocalStorage에 저장되는 모습
예외 처리 모습

Javscript 코드

# public/js/write.js

const writeFrm = document.querySelector("#writeFrm");

class Board {
  constructor(indexNum, subjectStr, writerStr, contentStr) {
    this.index = indexNum;
    this.Subject = subjectStr;
    this.Writer = writerStr;
    this.Content = contentStr;
    this.date = recordDate();
    this.views = 0;
  }

  set Subject(value) {
    if (value.length === 0) throw new Error("제목을 입력해주세요.");
    this.subject = value;
  }

  set Writer(value) {
    if (value.length === 0) throw new Error("작성자를 입력해주세요.");
    this.writer = value;
  }

  set Content(value) {
    if (value.length === 0) throw new Error("내용을 입력해주세요.");
    this.content = value;
  }
}

const recordDate = () => {
  const date = new Date();
  const yyyy = date.getFullYear();
  let mm = date.getMonth() + 1;
  let dd = date.getDate();

  mm = (mm > 9 ? "" : 0) + mm;
  dd = (dd > 9 ? "" : 0) + dd;

  const arr = [yyyy, mm, dd];

  return arr.join("-");
};

const submitHandler = (e) => {
  e.preventDefault();
  const subject = e.target.subject.value;
  const writer = e.target.writer.value;
  const content = e.target.content.value;

  try {
    // boards 가져오기
    const boardsObj = JSON.parse(localStorage.getItem("boards"));

    // 객체 추가
    const index = boardsObj.length;
    const instance = new Board(index, subject, writer, content);
    boardsObj.push(instance);

    // boards 저장
    const boardsStr = JSON.stringify(boardsObj);
    localStorage.setItem("boards", boardsStr);
    location.href = "/board/view.html?index=" + index;
  } catch (e) {
    // 예외 발생시 메시지 출력
    alert(e.message);
    console.error(e);
  }
};

writeFrm.addEventListener("submit", submitHandler);

# public/js/list.js

let boardsStr = localStorage.getItem("boards");

if (boardsStr === null) {
  const listStr = JSON.stringify([]);
  localStorage.setItem("boards", listStr);
  boardsStr = listStr;
}

작업 내용

댓글을 구현하기 위한 CRUD 중 C와 R을 구현해 보자!

다음은 구현해야 할 내용이다.

댓글 입력 (Create)

  1. 댓글 입력 폼에 내용을 입력한 뒤 submit을 누르면 리스트에 추가된다.
  2. 입력 폼이 비어있는 상태에서 submit을 누르면 경고 팝업을 띄운다.
  3. 댓글을 성공적으로 처리하면 입력 폼을 reset 한다.
  4. 입력한 값을 아이디, 댓글 내용, 날짜 형태로 된 객체로 만들어 리스트에 넣는다.

댓글 출력 (Read)

  1. 댓글 내용은 아이디, 댓글 내용, 날짜로 표현한다.
  2. 댓글 리스트는 최신순으로 나타낸다.
  3. 댓글 총 개수를 표시한다.

구현

HTML / CSS

일단 HTML과 CSS는 미리 구현되어 있는 걸 사용한다. Javascript로 Create와 Read를 구현하는데 집중하자!

#  practice.html

<!DOCTYPE html>
<html lang="en">
  <head>
    <meta charset="UTF-8" />
    <meta http-equiv="X-UA-Compatible" content="IE=edge" />
    <meta name="viewport" content="width=device-width, initial-scale=1.0" />
    <title>Document</title>
    <link rel="stylesheet" href="public/css/practice.css" />
  </head>
  <body>
    <div>
      <ul class="comment">
        <li class="comment-form">
          <form id="commentFrm">
            <h4>댓글쓰기 <span></span></h4>
            <span class="ps_box">
              <input type="text" placeholder="댓글 내용을 입력해주세요." class="int" name="content" />
            </span>
            <input type="submit" class="btn" value="등록" />
          </form>
        </li>
        <li id="comment-list"></li>
      </ul>
    </div>
    <script src="public/js/practice.js"></script>
  </body>
</html>

# practice.css

* {
  margin: 0;
  padding: 0;
}
ul,
li {
  list-style: none;
}

.comment {
  display: flex;
  flex-direction: column;
  flex-wrap: nowrap;
  padding: 30px;
  width: 600px;
  margin: 0 auto;
}

.comment > li {
  margin-top: 20px;
}
.comment > li:nth-child(1) {
  margin: 0px;
}

.comment-row {
  display: flex;
  justify-content: space-between;
  flex-direction: row;
}

.comment-row {
  margin-top: 20px;
  width: 100%;
}

.comment-row > li:nth-child(2) {
  flex-shrink: 0;
  flex-grow: 1;
  padding-left: 25px;
  z-index: 1;
  width: 100%;
}

.comment-row > li:nth-child(2) {
  width: 85px;
}

.comment-form > form {
  display: flex;
  flex-direction: row;
  flex-wrap: wrap;
  justify-content: space-between;
}

.comment-form > form > h4 {
  width: 100%;
  margin: 14px 0 14px 0;
}

.comment-content {
  cursor: pointer;
  word-break: break-all;
  padding-right: 25px;
}

.ps_box {
  display: block;
  position: relative;
  width: 80%;
  height: 51px;
  border: solid 1px #dadada;
  padding: 10px 14px 10px 14px;
  background: #fff;
  box-sizing: border-box;
}

.ps_box > input {
  outline: none;
}

.int {
  display: block;
  position: relative;
  width: 100%;
  height: 29px;
  padding-right: 25px;
  line-height: 29px;
  border: none;
  background: #fff;
  font-size: 15px;
  box-sizing: border-box;
  z-index: 10;
}

.btn {
  width: 18%;
  padding: 18px 0 16px;
  text-align: center;
  box-sizing: border-box;
  text-decoration: none;
  border: none;
  background: #333;
  color: #fff;
  font-size: 14px;
}

.comment-delete-btn {
  display: inline-block;
  margin-left: 7px;
  cursor: pointer;
}

.comment-update-input {
  border: none;
  border-bottom: 1px solid #333;
  font-size: 16px;
  color: #666;
  outline: none;
}

댓글쓰기 초기 화면

Javascript

1. 댓글 입력폼에 내용을 입력한 뒤 submit을 누르면 리스트에 추가 (Create)

댓글 입력폼에 내용을 입력한 뒤 submit을 누르면 리스트에 추가가 되도록 해보자!

먼저 사용할 요소를 선택해 준다. submit 이벤트는 form 요소에서만 사용이 가능하기 때문에 submit 이벤트 사용을 위해 form 요소를 선택해주자!

const commentBtn = document.querySelector("#commentFrm");
const list = [];

console.log(commentBtn);

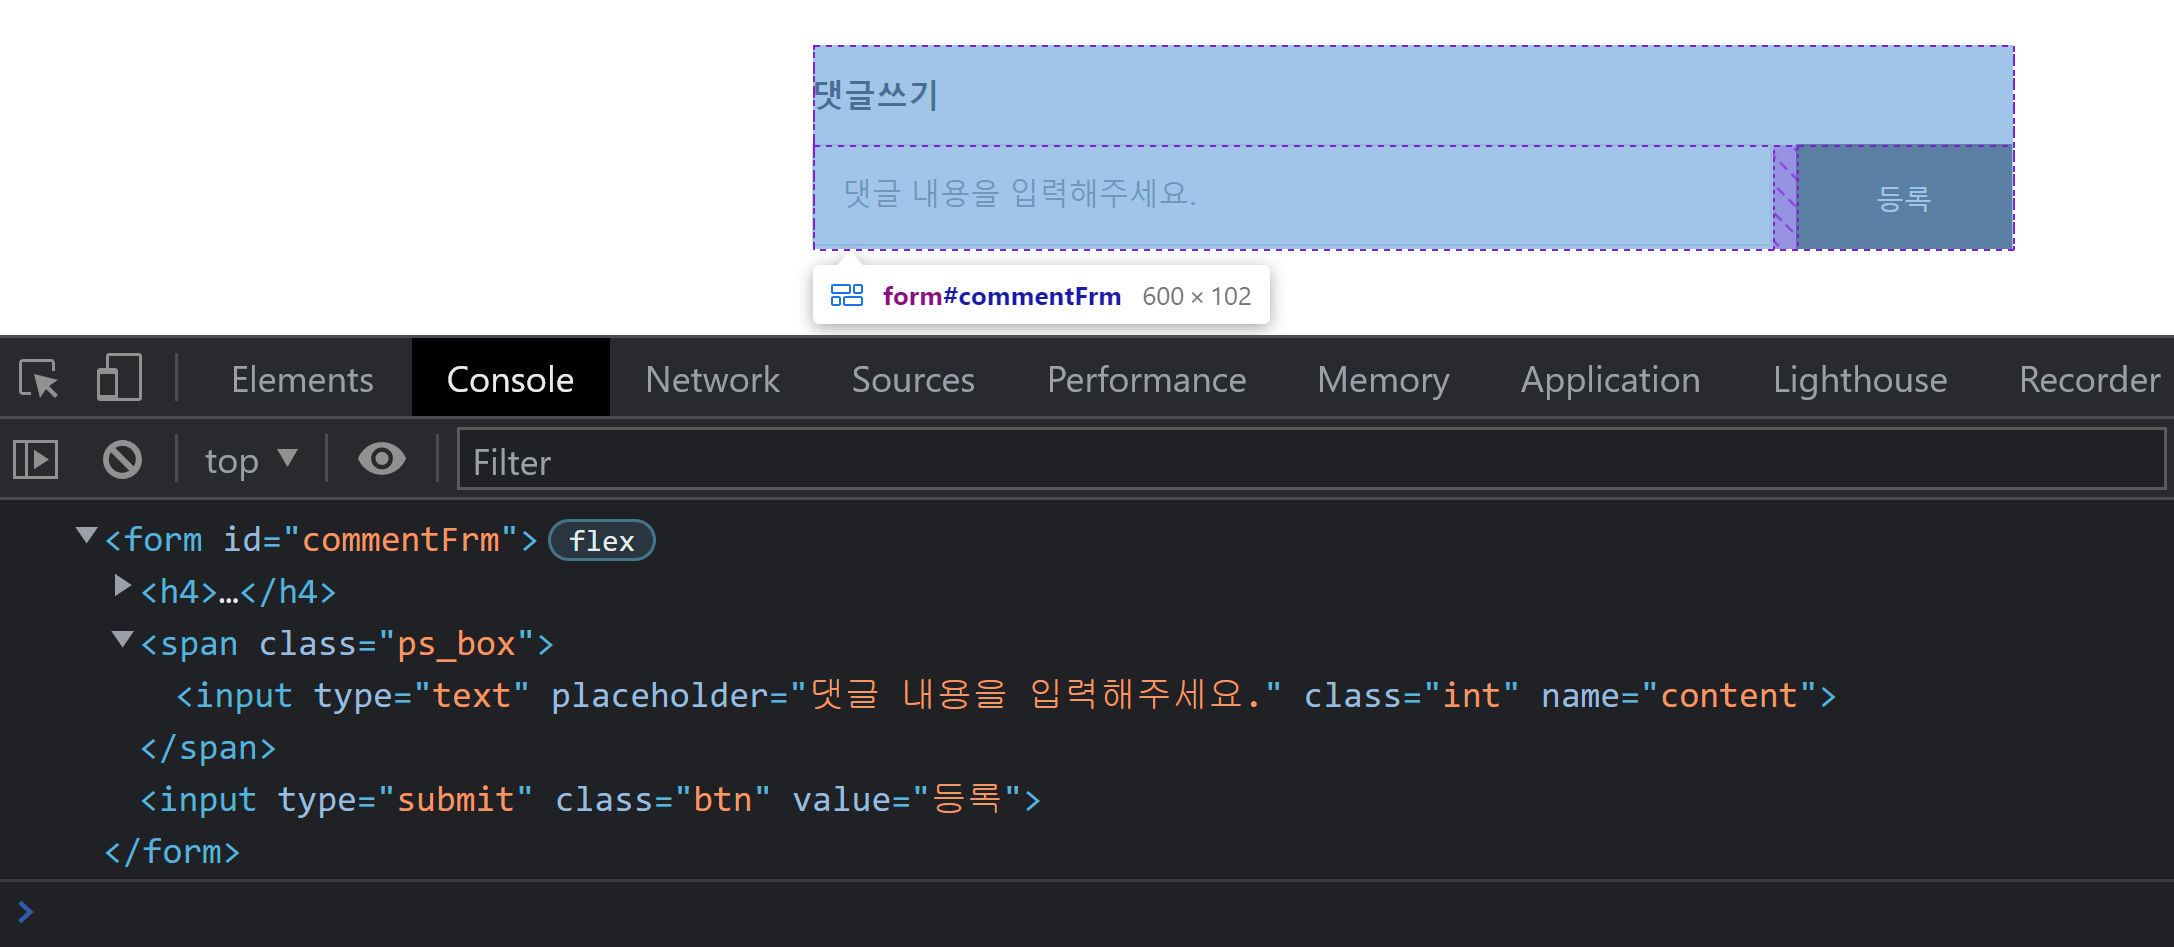
사용할 요소 선택 후 확인

Event.preventDefault()

이벤트 흐름의 어떤 단계에서도 preventDefault()를 호출하면 기본 동작을 취소할 수 있다.
예를 들면 a 태그나 submit 태그는 누르면 href를 통해 이동하거나 창이 새로고침 되어 실행이 된다.
preventDefault()를 이용해 이 동작을 막아줄 수 있다.

submit 버튼을 누르면 input을 통해 입력받은 값들을 key=value 형태로 서버에 전송해 준다고 한다. 전송되고 나면 창이 새로고침 되는데 이렇게 되면 input에 입력한 값을 javascript에서 사용하기 어렵다. preventDefault()를 이용해서 submit 버튼의 기본 동작을 막아주자! 그리고 이벤트도 등록해 주자!

추가로 버튼을 클릭해 input에 값을 입력하면 어디에 값이 들어가는지도 찾아보자! 

const commentBtn = document.querySelector("#commentFrm");
const list = [];

function commentBtnHandler(e) {
  e.preventDefault();
  console.dir(e.target);
  console.log(e.target[0]);
  console.log(e.target[0].value);
  console.log(e.target.elements[0]);
  console.log(e.target.elements[0].value);
  console.log(e.target.elements.content);
  console.log(e.target.elements.content.value);
  console.log(e.target.content);
  console.log(e.target.content.value);
}

commentBtn.addEventListener("submit", commentBtnHandler);

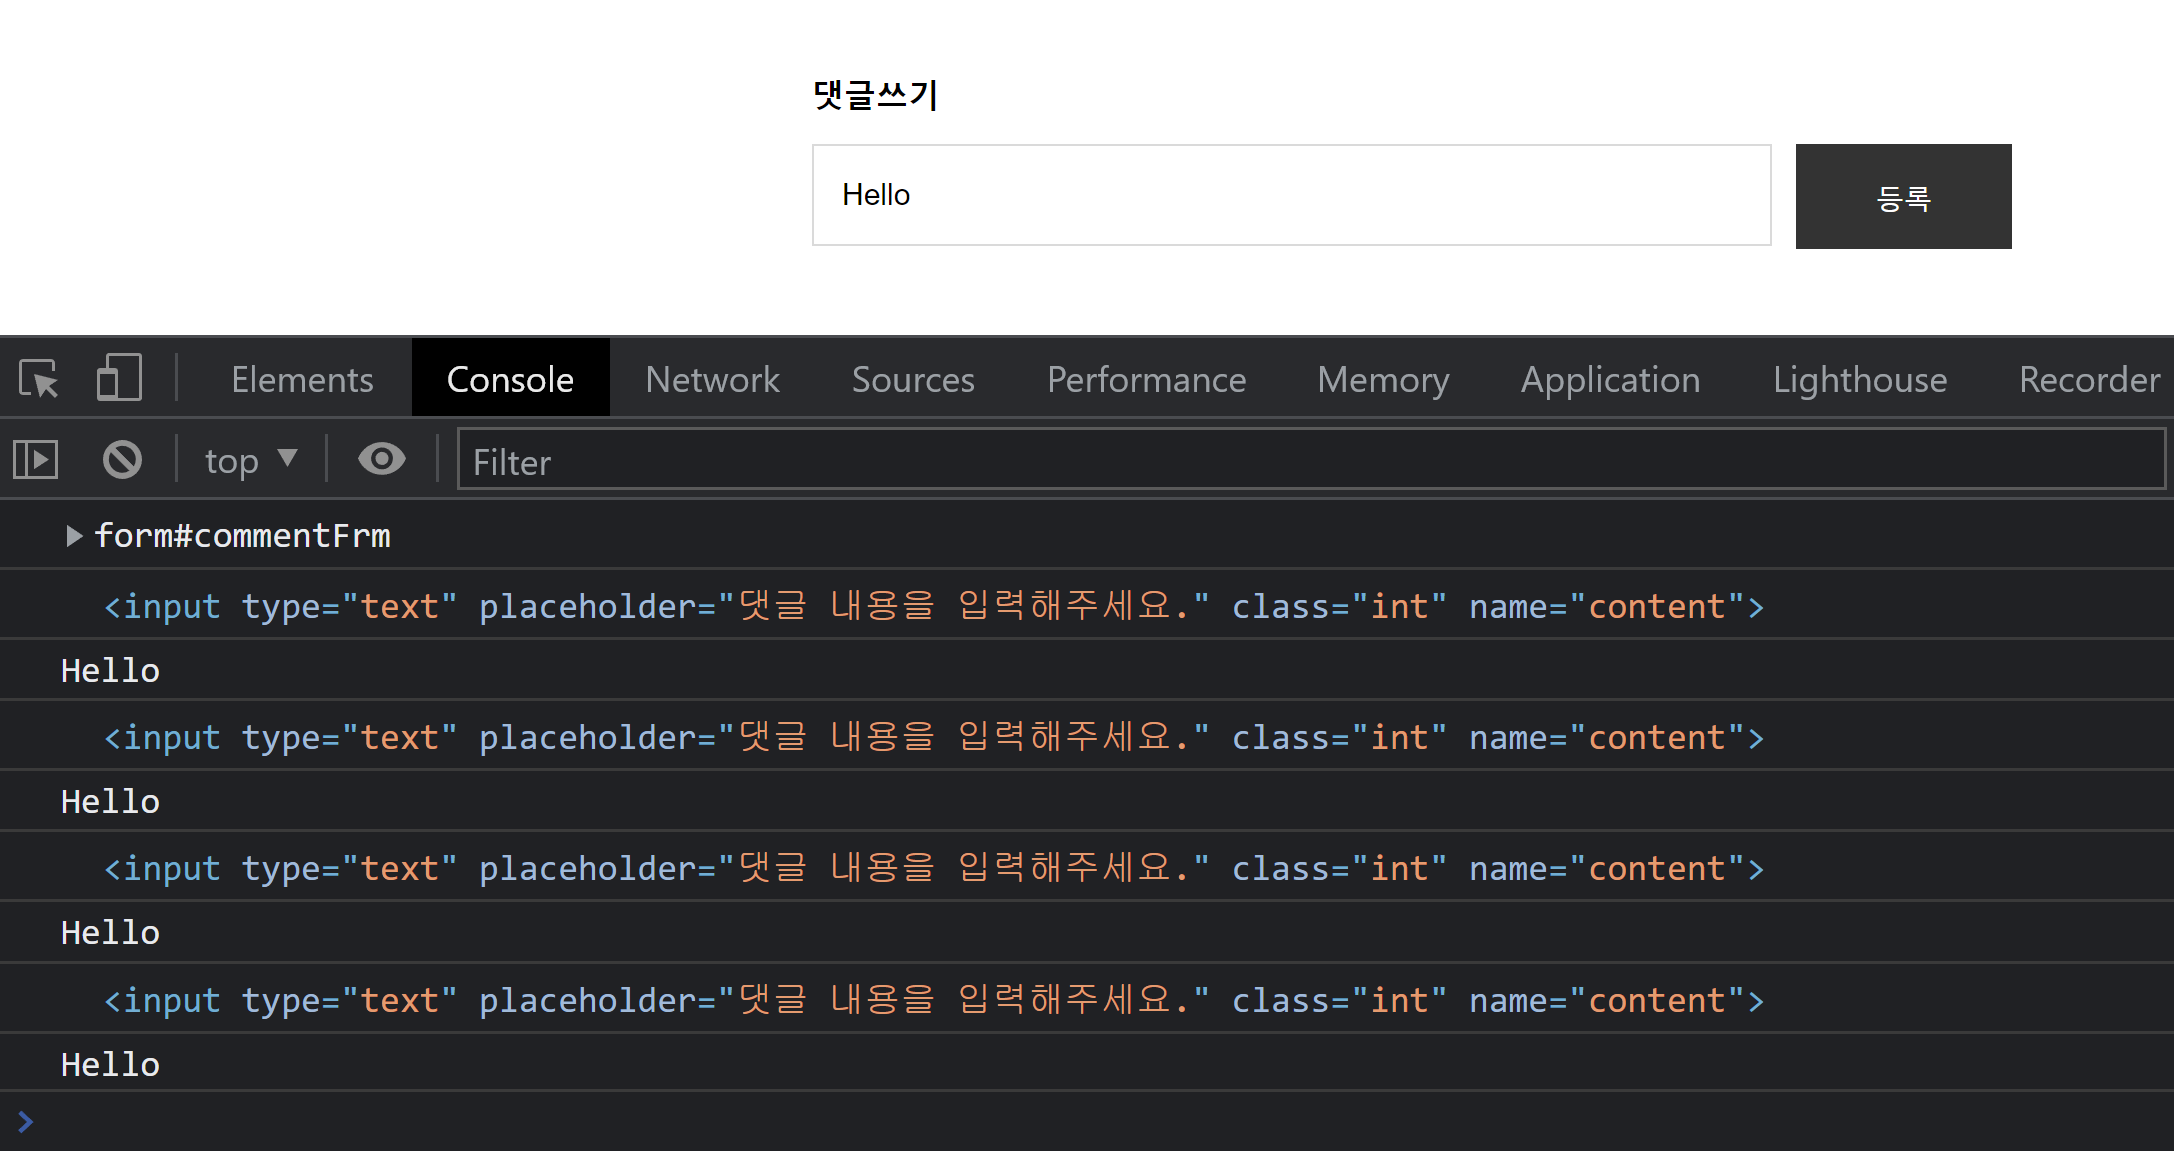
input에 값을 넣고 submit을 누르면 이벤트 객체가 생성되는데 이 객체안에객체 안에 무수한 객체들이 존재한다. 내가 원하는 input에 입력한 값을 찾아보았는데 위와 같은 객체 안에 value값으로 값이 존재하고 있었다. 이 부분은 조금 더 공부를 해봐야 알 것 같다. 나는 일단 마지막에 적은 e.target.content의 value를 사용할 예정이다.


input에 입력한 Hello값을 찾아본 결과

input에 입력한 값을 찾았으니 이걸 list에 push를 사용해 담아주기만 하면 이 작업은 끝난다.

const commentBtn = document.querySelector("#commentFrm");
const list = [];

function commentBtnHandler(e) {
  e.preventDefault();
  list.push(e.target.content.value);
  return console.log(list);
}

commentBtn.addEventListener("submit", commentBtnHandler);

list에 input에 입력한 값 담기

2. 입력폼이 비어있는 상태에서 submit을 누르면 경고 팝업 띄우기 (Create)

이건 간단하다 조건문을 사용해 빈 문자열이면 alert를 이용해 경고창을 띄우면 된다.

const commentBtn = document.querySelector("#commentFrm");
const list = [];

function commentBtnHandler(e) {
  e.preventDefault();
  const input = e.target.content;
  if (input.value === "") {
    alert("내용을 넣고 등록 버튼을 눌러주세요.");
    return;
  }
  list.push(input.value);
}

commentBtn.addEventListener("submit", commentBtnHandler);

비어있는 상태에서 등록을 하려고 하면 경고 팝업띄우기


3. 댓글을 성공적으로 처리하면 입력폼을 reset (Create)

이 작업은 form 요소의 reset 메서드를 사용한다. 


HTMLFormElement.reset()
이 메서드는 요소의 값을 기본값으로 초기화하는 메서드이다.
const commentBtn = document.querySelector("#commentFrm");
const list = [];

function commentBtnHandler(e) {
  e.preventDefault();
  const input = e.target.content;
  if (input.value === "") {
    alert("내용을 넣고 등록 버튼을 눌러주세요.");
    return;
  }
  list.push(input.value);
  e.target.reset();
}

commentBtn.addEventListener("submit", commentBtnHandler);

내용을 넣고 등록을 하면 입력 내용이 초기화되는 모습

4. 입력한 값을 아이디, 댓글 내용, 날짜 형태로 된 객체로 만들어 리스트에 넣기 (Create)

사용자의 아이디, 댓글 내용, 날짜는 달라야 하지만 여기서는 댓글 내용 부분만 다르게 할 예정이다.

먼저 아이디, 댓글 내용, 날짜를 담는 객체를 찍어낼 생성자 함수를 선언하자!

function Comment(content) {
  this.userid = "cloudcoke";
  this.content = content;
  this.date = "2022-11-15";
}

생성자 함수 테스트 결과

submit을 누르면 작성한 댓글이 들어간 객체를 생성해 리스트에 넣는 작업을 해보자!

const commentBtn = document.querySelector("#commentFrm");
const list = [];

function Comment(content) {
  this.userid = "cloudcoke";
  this.content = content;
  this.date = "2022-11-15";
}

function commentBtnHandler(e) {
  e.preventDefault();
  const input = e.target.content;
  if (input.value === "") {
    alert("내용을 넣고 등록 버튼을 눌러주세요.");
    return;
  }
  const commentObj = new Comment(input.value);
  list.push(commentObj);
  e.target.reset();
}

commentBtn.addEventListener("submit", commentBtnHandler);

작성한 댓글이 들어간 객체를 가진 리스트

Create은 끝났다. 이제 Read 부분을 작업해 보자!

1. 댓글 내용은 아이디, 댓글 내용, 날짜로 표현 (Read)

댓글을 쓰게되면 입력란 아래에 쓴 댓글이 보이도록 해야 한다. 출력돼야 하는 부분은 아이디, 댓글 내용, 날짜이다.

먼저 요소를 추가할 부분인 comment-list를 선택한다.

const commentList = document.querySelector("#comment-list");

console.log(commentList);

comment-list를 선택한 결과

이제 요소를 생성해야 한다.

요소 생성은 createElement 메서드를 이용해 요소를 생성할 수 있다.

요소를 생성할 때 다음과 같이 하지 않도록 주의해야 한다.

요소를 생성한 값은 리턴값이 참조 형태이기 때문에 하나를 수정해도 다른 것들에게 영향을 미치기 때문이다.

const li1 = document.createElement("li"); // 참조형태이기 때문에
const li2 = li1;
const li3 = li1;

// 위 코드는 다음과 같음
const obj1 = {};
const obj2 = obj1;
const obj3 = obj1;

요소를 다음과 같이 생성하자!

ul 태그 생성하고 li 태그를 3개를 생성해 주면 된다. 

function createRow() {
  const ul = document.createElement("ul");
  const li1 = document.createElement("li");
  const li2 = document.createElement("li");
  const li3 = document.createElement("li");

  console.log(ul);
  console.log(li1);
  console.log(li2);
  console.log(li3);
}

생성된 요소 확인

요소를 생성하면 생성만 되고 아무 변화가 없다. 원하는 형태로 만들려면 ul안에 li를 넣어 줘야 한다.

function createRow() {
  const ul = document.createElement("ul");
  const li1 = document.createElement("li");
  const li2 = document.createElement("li");
  const li3 = document.createElement("li");

  ul.append(li1);
  ul.append(li2);
  ul.append(li3);

  return ul;
}

원하는 형태로 만들어진 모습

CSS를 적용하려면 생성한 요소에 class 속성을 부여해야 한다. setAttribute 메서드를 사용하면 원하는 속성을 부여할 수 있다.

function createRow() {
  const ul = document.createElement("ul");
  const li1 = document.createElement("li");
  const li2 = document.createElement("li");
  const li3 = document.createElement("li");

  ul.append(li1);
  ul.append(li2);
  ul.append(li3);

  ul.setAttribute("class", "comment-row");
  li1.setAttribute("class", "comment-id");
  li2.setAttribute("class", "comment-content");
  li3.setAttribute("class", "comment-date");

  return ul;
}

class 속성이 부여된 모습

아이디, 댓글 내용, 날짜를 화면에 출력하려면 innerHTML을 이용해 요소에 내용을 추가해 주어야 한다.

매개변수 3개를 받아서 각각 li1과 li2와 li3에 내용을 추가해 주자!

function createRow(userid, content, date) {
  const ul = document.createElement("ul");
  const li1 = document.createElement("li");
  const li2 = document.createElement("li");
  const li3 = document.createElement("li");

  ul.append(li1);
  ul.append(li2);
  ul.append(li3);

  ul.setAttribute("class", "comment-row");
  li1.setAttribute("class", "comment-id");
  li2.setAttribute("class", "comment-content");
  li3.setAttribute("class", "comment-date");

  li1.innerHTML = userid;
  li2.innerHTML = content;
  li3.innerHTML = date;

  return ul;
}

createRow 테스트 결과

이제 생성한 요소를 comment-list 부분에 추가하자!

function drawing() {
  for (let i = 0; i < list.length; i++) {
    const row = createRow(list[i].userid, list[i].content, list[i].date);
    commentList.append(row);
  }
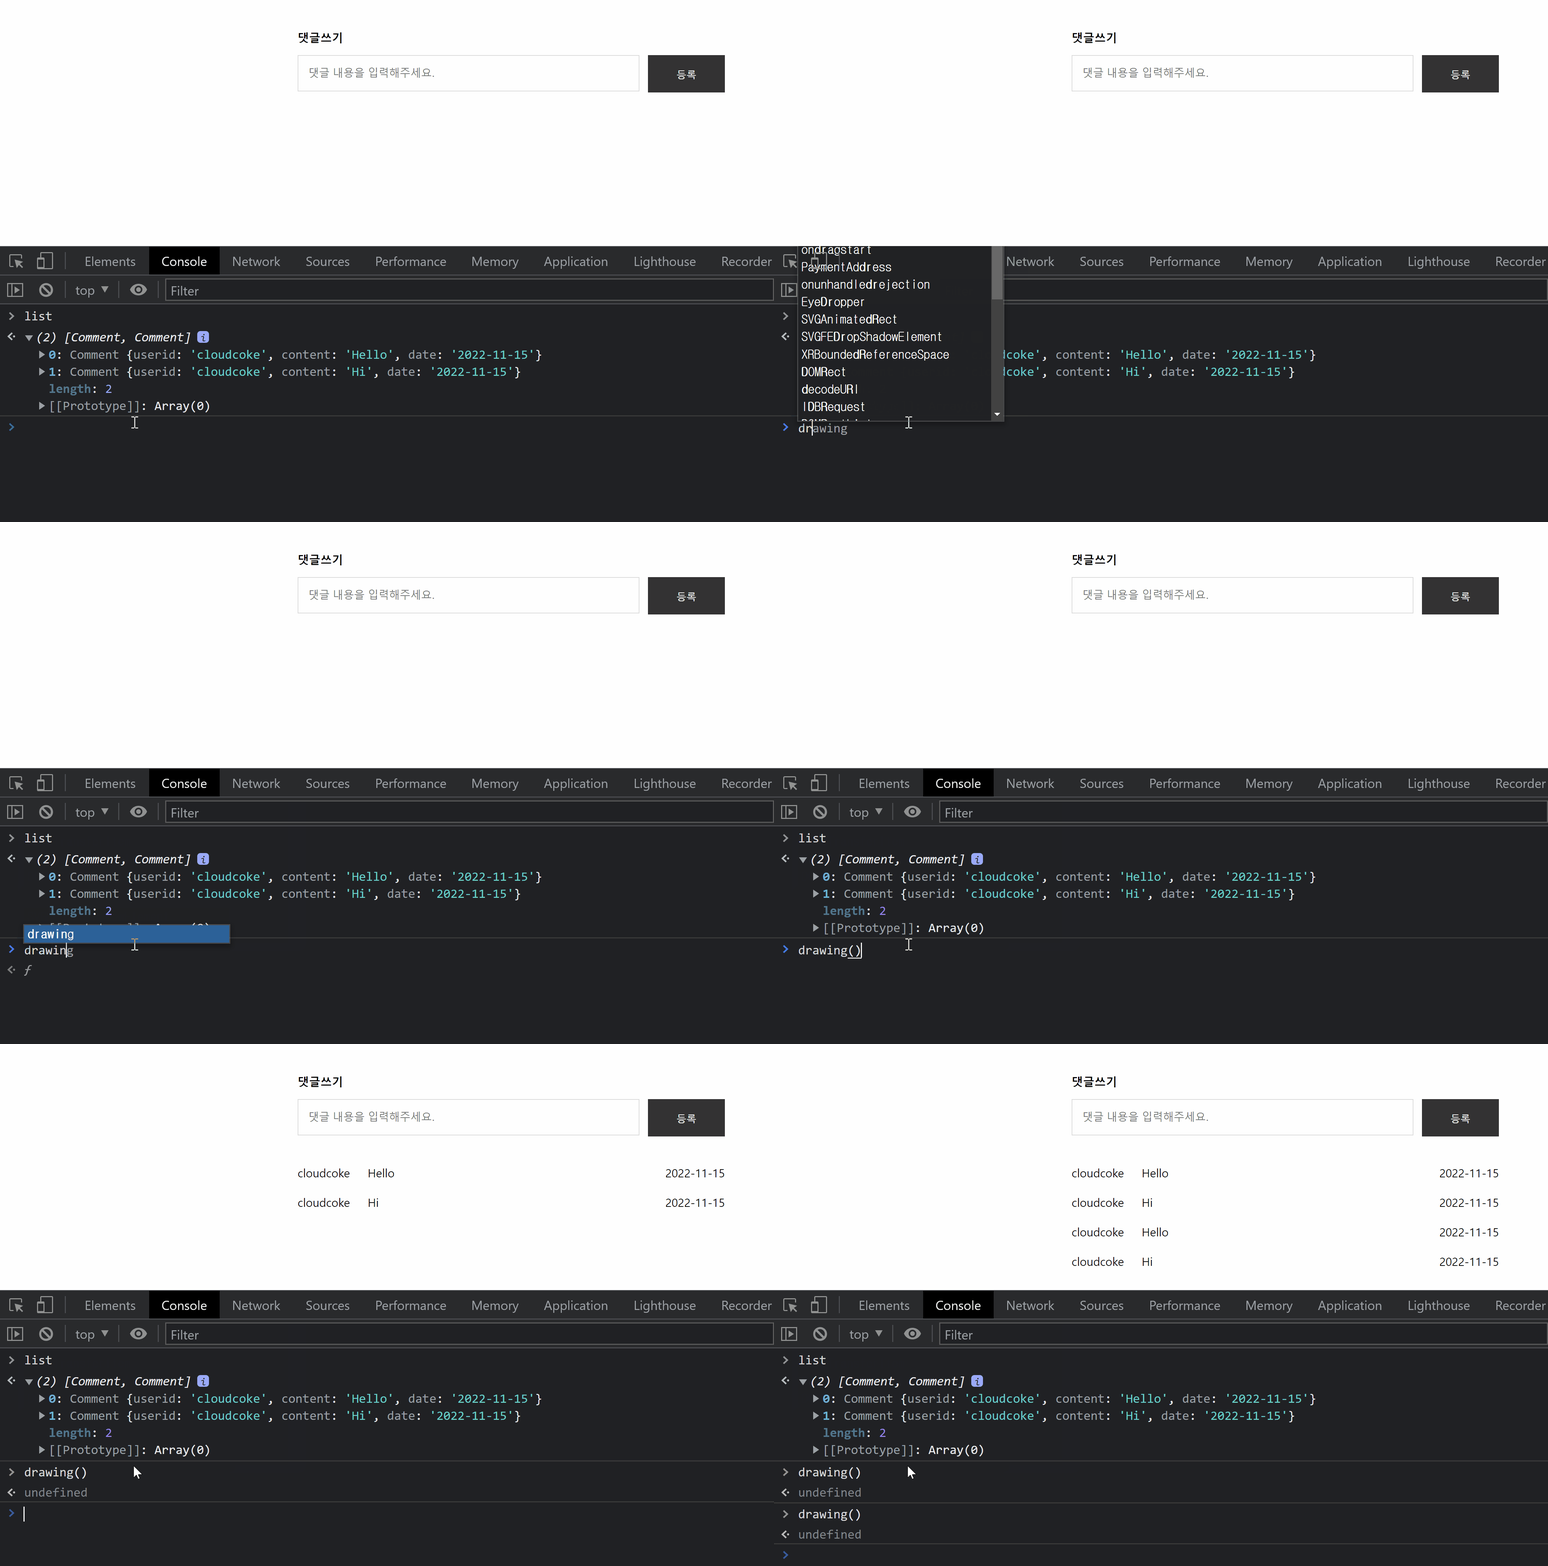
}


drawing 함수 테스트 결과

ul을 만들기 위해 createRow 함수를 호출 했고 li 안에 콘텐츠를 채우기 위해 list에 있는 객체를 이용했다. 그다음 그 값을 commentList에 추가해 comment-list에 요소가 추가될 수 있도록 하였다.

여기서 문제가 발생한다. drawing 함수를 호출할 때마다 값이 누적되어서 출력이 된다.

drawing 함수를 호출할 때 commentList를 빈 값으로 만들어 주면 문제가 해결된다.

function drawing() {
  commentList.innerHTML = "";
  for (let i = 0; i < list.length; i++) {
    const row = createRow(list[i].userid, list[i].content, list[i].date);
    commentList.append(row);
  }
}

drawing 함수 문제 해결

이 함수를 commentBtnHandler에 넣어주면 댓글을 쓸때마다 아래에 입력한 내용이 출력되게 된다.

function commentBtnHandler(e) {
  e.preventDefault();
  const input = e.target.content;
  if (input.value === "") {
    alert("내용을 넣고 등록 버튼을 눌러주세요.");
    return;
  }
  const commentObj = new Comment(input.value);
  list.push(commentObj);

  drawing();
  e.target.reset();
}

commentBtnHandler에 drawing 함수를 넣은 결과

2. 댓글 리스트는 최신순으로 나타낸다. (Read)

댓글을 등록하면 마지막에 작성한 댓글이 맨 아래에 나오게 된다. 맨 마지막에 작성한 댓글이 맨 위로 올라오게 하려면 어떻게 해야 할까?

다음과 같이 drawing 함수를 수정해 주면 된다.

function drawing() {
  commentList.innerHTML = "";
  for (let i = list.length - 1; i >= 0; i--) {
    const row = createRow(list[i].userid, list[i].content, list[i].date);
    commentList.append(row);
  }
}

for문을 역순으로 돌린 결과

for문을 역순으로 돌리면 해결이 된다.

3. 댓글 총개수를 표현다. (Read)

댓글의 총 개수를 표현하는 방법은 쉽다. 다음과 같이 코드를 작성해 주면 된다.

const total = document.querySelector("h4 > span");

function totalRecord() {
  total.innerHTML = `(${list.length})`;
}

totalRecord 함수 테스트

이 함수도  commentBtnHandler에 넣어주면 댓글을 작성할 때마다 갱신이 된다.

function totalRecord() {
  total.innerHTML = `(${list.length})`;
}

function commentBtnHandler(e) {
  e.preventDefault();
  const input = e.target.content;
  if (input.value === "") {
    alert("내용을 넣고 등록 버튼을 눌러주세요.");
    return;
  }
  const commentObj = new Comment(input.value);
  list.push(commentObj);
  totalRecord();

  drawing();
  e.target.reset();
}

commentBtnHandler에 totalRecord 함수를 넣은 결과

그리고 처음부터 댓글 개수를 보고 싶다면 전역에 호출을 해주면 된다.

아래는 최종 완성 코드이다.

const commentBtn = document.querySelector("#commentFrm");
const commentList = document.querySelector("#comment-list");
const total = document.querySelector("h4 > span");
const list = [];

function Comment(content) {
  this.userid = "cloudcoke";
  this.content = content;
  this.date = "2022-11-15";
}

function createRow(userid, content, date) {
  const ul = document.createElement("ul");
  const li1 = document.createElement("li");
  const li2 = document.createElement("li");
  const li3 = document.createElement("li");

  ul.append(li1);
  ul.append(li2);
  ul.append(li3);

  ul.setAttribute("class", "comment-row");
  li1.setAttribute("class", "comment-id");
  li2.setAttribute("class", "comment-content");
  li3.setAttribute("class", "comment-date");

  li1.innerHTML = userid;
  li2.innerHTML = content;
  li3.innerHTML = date;

  return ul;
}

function drawing() {
  commentList.innerHTML = "";
  for (let i = list.length - 1; i >= 0; i--) {
    const row = createRow(list[i].userid, list[i].content, list[i].date);
    commentList.append(row);
  }
}

function totalRecord() {
  total.innerHTML = `(${list.length})`;
}

function commentBtnHandler(e) {
  e.preventDefault();
  const input = e.target.content;
  if (input.value === "") {
    alert("내용을 넣고 등록 버튼을 눌러주세요.");
    return;
  }
  const commentObj = new Comment(input.value);
  list.push(commentObj);
  totalRecord();

  drawing();
  e.target.reset();
}

totalRecord();
commentBtn.addEventListener("submit", commentBtnHandler);

최종 완성

참고

https://developer.mozilla.org/ko/docs/Web/API/Event/preventDefault

https://programming119.tistory.com/100

https://developer.mozilla.org/en-US/docs/Web/API/HTMLFormElement/reset

이번에는 이전에 만들었던 로또 번호 생성기에 정렬 기능을 추가하고 전체적으로 코드 수정을 해보았다.

추가로 로또의 보너스 번호도 추가해 보았다.

먼저 정렬 알고리즘에 대해서 알아보고 가자!

정렬 알고리즘


정렬(Sorting)이란 데이터를 특정한 기준에 따라서 순서대로 나열하는 것을 말한다. 사람들은 정렬을 쉽게 할 수 있지만 컴퓨터에게는 쉬운 일은 아니다. 컴퓨터는 사람과 다르게 규칙성을 알지 못하기 때문에 우리가 코드를 잘 짜줘야 한다.

정렬 알고리즘의 종류는 다양하다. 버블 정렬, 선택 정렬, 삽입 정렬, 퀵 정렬, 계수 정렬 등이 있다. 이 중에서 나는 오늘 배운 버블 정렬을 사용해 보았다. 찾아보니 버블 정렬이 가장 효율이 좋지 않은 정렬이라고 한다. 하지만 초보자가 이해하기 쉽고 코드가 짧은 장점이 있다고 한다. 

버블 정렬


버블 정렬은 옆에 있는 값과 비교해서 더 큰 값을 뒤로 보내는 정렬이다. (오름차순 기준)

다음 그림과 같이 바로 옆에 있는 값을 비교해 앞쪽 값이 더 크다면 뒤로 보내면서 정렬을 한다.

버블 정렬 예시
 

버블 정렬 코드는 다음과 같다.

function bubleSort(arr) {
  let temp;
  for (let i = 0; i < arr.length - 1; i++) {
    for (let j = 0; j < arr.length - 1 - i; j++) {
      if (arr[j] > arr[j + 1]) {
        temp = arr[j];
        arr[j] = arr[j + 1];
        arr[j + 1] = temp;
      }
    }
  }
  return arr;
}

1. 값을 임시로 담을 temp 변수를 선언한다.

2. 배열의 길이의 - 1 만큼 반복한다. (2개씩 비교하기 때문에)

3. 배열의 길이의 -1 - i 만큼 반복한다. (마지막 값은 정렬이 끝났기 때문에 1번씩 반복 횟수가 줄어듬)

4. 만약 왼쪽 배열의 값이 오른쪽 배열의 값보다 크다면

5. 왼쪽 배열의 값을 temp 변수에 넣는다.

6. 오른쪽 배열의 값을 왼쪽 배열에 넣는다.

7. temp 변수의 값을 오른쪽 배열의 값에 넣는다. (5 ~ 7 : swap)


버블 정렬을 이용해 수정한 코드를 보자!

로또 번호 생성기 코드


# practice.html

<!DOCTYPE html>
<html lang="en">
  <head>
    <meta charset="UTF-8" />
    <meta http-equiv="X-UA-Compatible" content="IE=edge" />
    <meta name="viewport" content="width=device-width, initial-scale=1.0" />
    <title>Document</title>
    <link rel="stylesheet" href="public/css/practice.css" />
  </head>
  <body>
    <div id="wrap">
      <h2>로또 번호 생성기</h2>
      <div id="container">
        <div id="lotto_contain">
          <ul id="lotto_box">
            <li>1</li>
            <li>2</li>
            <li>3</li>
            <li>4</li>
            <li>5</li>
            <li>6</li>
          </ul>
          <div id="result">당첨번호</div>
        </div>
        <div id="plus">+</div>
        <div id="bonus_contain">
          <div id="bonus_box">
            <div id="bonus_num">6</div>
          </div>
          <div id="bonus_text">보너스</div>
        </div>
      </div>
      <button id="create_num">번호 생성</button>
    </div>
    <script src="public/js/practice.js"></script>
  </body>
</html>

# practice.css

* {
  margin: 0;
  padding: 0;
  box-sizing: border-box;
}

ul,
li {
  list-style: none;
}

#wrap {
  width: 100%;
  text-align: center;
}

#wrap > h2 {
  font-size: 45px;
}

#container {
  display: flex;
  justify-content: center;
  margin-top: 30px;
}

#container > #lotto_contain > #lotto_box {
  width: 800px;
  height: 150px;
  display: flex;
  justify-content: space-evenly;
  align-items: center;
  border-radius: 25px;
  background-color: #fafafa;
}

#container > #lotto_contain > #lotto_box > li {
  display: flex;
  justify-content: center;
  align-items: center;
  width: 100px;
  height: 100px;
  font-size: 40px;
  border-radius: 50px;
  color: white;
  font-weight: bold;
}

#container > #lotto_contain > #result {
  margin-top: 15px;
  font-size: 16px;
  font-weight: bold;
  color: #555;
}

#container > #plus {
  display: flex;
  justify-content: center;
  align-items: center;
  width: 100px;
  height: 150px;
  font-size: 60px;
  font-weight: bold;
  color: #999;
}

#container > #bonus_contain > #bonus_box {
  display: flex;
  justify-content: center;
  align-items: center;
  width: 150px;
  height: 150px;
  border-radius: 25px;
  background-color: #fafafa;
}

#container > #bonus_contain > #bonus_box > #bonus_num {
  display: flex;
  justify-content: center;
  align-items: center;
  width: 100px;
  height: 100px;
  font-size: 40px;
  border-radius: 50px;
  color: white;
  font-weight: bold;
}

#container > #bonus_contain > #bonus_text {
  margin-top: 15px;
  font-size: 16px;
  font-weight: bold;
  color: #555;
}

#create_num {
  margin-top: 20px;
  width: 150px;
  height: 50px;
}

.range_1 {
  background-color: rgb(251, 196, 0);
}

.range_2 {
  background-color: rgb(105, 200, 242);
}

.range_3 {
  background-color: rgb(255, 114, 114);
}

.range_4 {
  background-color: rgb(170, 170, 170);
}

.range_5 {
  background-color: rgb(176, 216, 64);
}

# practice.js

const lottoList = document.querySelectorAll("#lotto_contain > #lotto_box > li");
const bonusElement = document.querySelector("#bonus_contain > #bonus_box > #bonus_num");
const numCreateBtn = document.querySelector("#create_num");

function numCreate() {
  const numList = [];
  const lottoNum = [];
  const result = {};
  let ranNumIndex = 0;
  for (let i = 0; i < 45; i++) {
    numList.push(i + 1);
  }

  for (let i = 0; i < 7; i++) {
    ranNumIndex = Math.floor(Math.random() * numList.length);
    lottoNum.push(numList[ranNumIndex]);
    numList.splice(ranNumIndex, 1);
  }

  const bonusNum = lottoNum[lottoNum.length - 1];
  lottoNum.splice(lottoNum.length - 1, 1);
  result["lottoNum"] = lottoNum;
  result["bonusNum"] = bonusNum;

  return result;
}

function rangeNum(num) {
  if (num >= 1 && num <= 10) {
    return "range_1";
  }
  if (num >= 11 && num <= 20) {
    return "range_2";
  }
  if (num >= 21 && num <= 30) {
    return "range_3";
  }
  if (num >= 31 && num <= 40) {
    return "range_4";
  }
  if (num >= 41 && num <= 45) {
    return "range_5";
  }
}

function sorting(arr) {
  let temp;
  for (let i = 0; i < arr.length - 1; i++) {
    for (let j = 0; j < arr.length - 1 - i; j++) {
      if (arr[j] > arr[j + 1]) {
        temp = arr[j];
        arr[j] = arr[j + 1];
        arr[j + 1] = temp;
      }
    }
  }
  return arr;
}

function resultLottoNum() {
  const resultNum = numCreate();
  const sortingNum = sorting(resultNum.lottoNum);
  for (i = 0; i < lottoList.length; i++) {
    lottoList[i].innerHTML = sortingNum[i];
    lottoList[i].className = rangeNum(sortingNum[i]);
  }
  bonusElement.innerHTML = resultNum.bonusNum;
  bonusElement.className = rangeNum(resultNum.bonusNum);

  return resultNum.lottoNum;
}

resultLottoNum();
numCreateBtn.addEventListener("click", resultLottoNum);

로또 번호 생성기 동작 화면

이전과 달라진 점은 이전에는 번호를 뽑을 때 매번 1부터 45까지에서 랜덤 한 번호를 뽑았다면 이번에는 1부터 45까지 있는 배열을 생성해서 번호를 뽑을 때마다 배열에서 요소를 하나씩 제거하면서 중복을 처리했다는 점이다.


HTML 문서에서 Javascript 파일을 연결하기 위해서 script 태그를 사용한다. HTML 문서에서 어느 곳에든 사용해도 되는데 위치에 따라 동작의 차이가 발생할 수 있다. 이는 브라우저의 동작 방식과 연관이 있다.

브라우저의 동작 방식


<!DOCTYPE html>
<html lang="en">
  <head>
    <meta charset="UTF-8" />
    <meta http-equiv="X-UA-Compatible" content="IE=edge" />
    <meta name="viewport" content="width=device-width, initial-scale=1.0" />
    <title>Document</title>
    <script src="public/js/test.js"></script>
  </head>
  <body>
    <div class="box" style="background: orange">1</div>
  </body>
</html>
const box = document.querySelector(".box");
console.log(box);

브라우저는 다음과 같이 HTML 파일을 읽게 된다.

브라우저가 HTML 파일을 읽는 방법

브라우저는 HTML 파일을 위에서부터 아래로 읽게 되는데 코드를 읽는 도중 script 태그를 만나게 되면 Javascript 파일을 불러와 읽고 실행한 다음에 다시 나머지 HTML 파일을 읽게 된다. Javascript를 읽을 당시에는 class 명이 box인 요소를 찾을 수 없기 때문에 null 값이 콘솔에 출력되게 된다.

script 태그를 상단에 작성한 결과

그래서 script 태그는 body 태그의 맨 아래쪽에 적어주는 것이 좋다.

<!DOCTYPE html>
<html lang="en">
  <head>
    <meta charset="UTF-8" />
    <meta http-equiv="X-UA-Compatible" content="IE=edge" />
    <meta name="viewport" content="width=device-width, initial-scale=1.0" />
    <title>Document</title>
  </head>
  <body>
    <div class="box" style="background: orange">1</div>
    <script src="public/js/test.js"></script>
  </body>
</html>
const box = document.querySelector(".box");
console.log(box);

script 태그를 하단에 작성한 결과

그렇다면 HTML 파일을 다 읽고 Javascript 파일을 실행할 수 없을까?

DomContentLoaded


Javasript에는 DOMContentLoaded라는 이벤트가 존재한다. 이 이벤트는 HTML 파일을 브라우저가 다 읽었을 때 실행이 되게 된다. 위에 작성한 코드를 DOMContentLoaded 이벤트를 활용해 바꿔보자!

<!DOCTYPE html>
<html lang="en">
  <head>
    <meta charset="UTF-8" />
    <meta http-equiv="X-UA-Compatible" content="IE=edge" />
    <meta name="viewport" content="width=device-width, initial-scale=1.0" />
    <title>Document</title>
    <script src="public/js/test.js"></script>
  </head>
  <body>
    <div class="box" style="background: orange">1</div>
  </body>
</html>
function init() {
  const box = document.querySelector(".box");
  console.log(box);
}

document.addEventListener("DOMContentLoaded", init);

DOMContentLoaded 이벤트 사용

DOMContentLoaded 이벤트를 사용할 때 주의해야 할 점이 있다. DOMContentLoaded 이벤트는 맨 마지막에 발생한다는 점이다.

<!DOCTYPE html>
<html lang="en">
  <head>
    <meta charset="UTF-8" />
    <meta http-equiv="X-UA-Compatible" content="IE=edge" />
    <meta name="viewport" content="width=device-width, initial-scale=1.0" />
    <title>Document</title>
    <script src="public/js/test.js"></script>
  </head>
  <body>
    <div class="box" style="background: orange">1</div>
    <script>
      console.log("왜 이게 먼저 실행돼?");
    </script>
  </body>
</html>
function init() {
  const box = document.querySelector(".box");
  console.log(box);
}

document.addEventListener("DOMContentLoaded", init);

하단에 있는 스크립트 코드가 먼저 실행되는 모습

DOMContentLoaded 이벤트는 모든 script가 실행이 된 후에 마지막에 발생되기 때문에 하단에 작성한 script 코드가 먼저 출력이 된 것이다. DOMContentLoaded 이벤트는 맨 마지막에 발생된다는 점을 꼭 기억하자!

script 코드는 어디에 적는게 가장 좋을까?


script 코드를 HTML 문서 상단에 작성했을 경우 script가 적은 경우에는 문제가 되지 않지만 script가 많은 경우 script가 끝날 때까지 html 로드가 끝나지 않게 된다. 이렇게 되면 아마 사용자는 화를 내면서 떠날 것이다.

script 코드를 HTML 문서 하단에 작성했을 경우에는 어떨까?

script 코드를 HTML 문서 하단에 작성하게 되면 HTML 문서가 모두 로드가 된 이후에 script 코드가 실행이 된다. 그러면 사용자는 script 코드의 실행 여부에 상관 없이 일단 사이트가 보이게 되니 script 코드가 실행되지 않았다는 사실을 알지 못할 것이다. 결론을 말하면 script 코드는 HTML 문서 하단에 작성하자! 만약 상단에 작성하였다면 DOMContentLoaded 이벤트라도 걸어주자!!!